
Have you been looking for the perfect summer top? The one to wear for walks around the city, coffee-shop dates, beach days? I present to you the LEAF HALTER/TANK TOP!

This top screams summer to me. With its bright colors, it instantly brightens my mood. With its halter straps and open back, it keeps me cool and stylish, too!
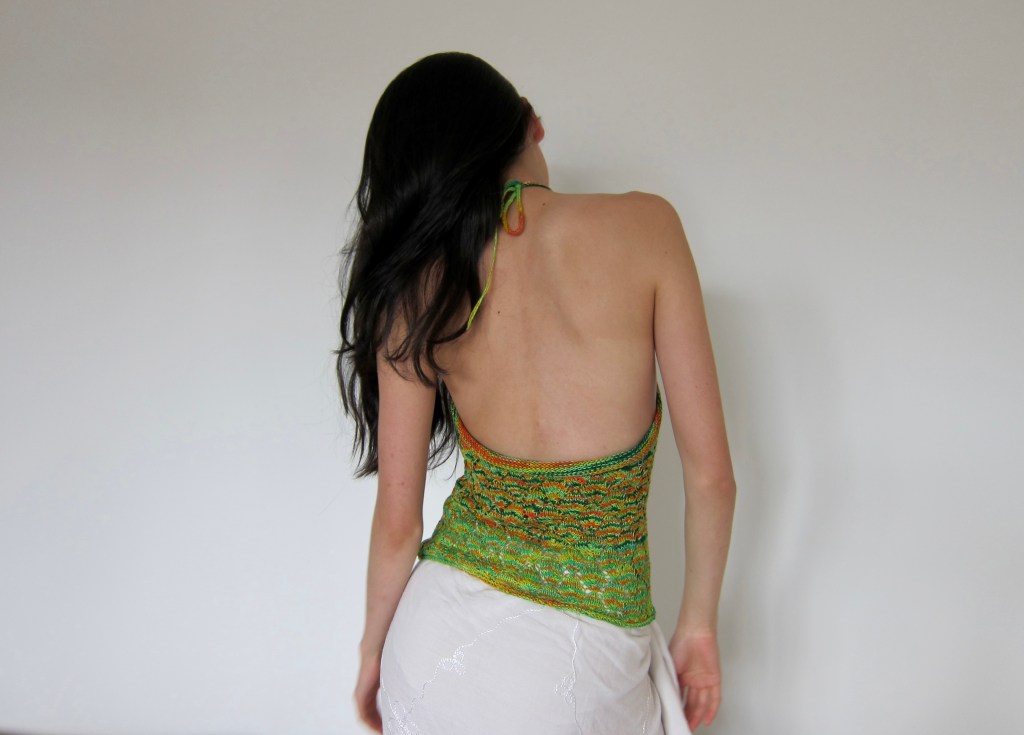
If you don’t like the halter style or deep back, don’t worry – there are instructions in the pattern to make this into a tank top!
Although this is a small top and is the perfect quick knitting project, my Leaf Halter actually took me over a year to make. The reason? I ran out of yarn!
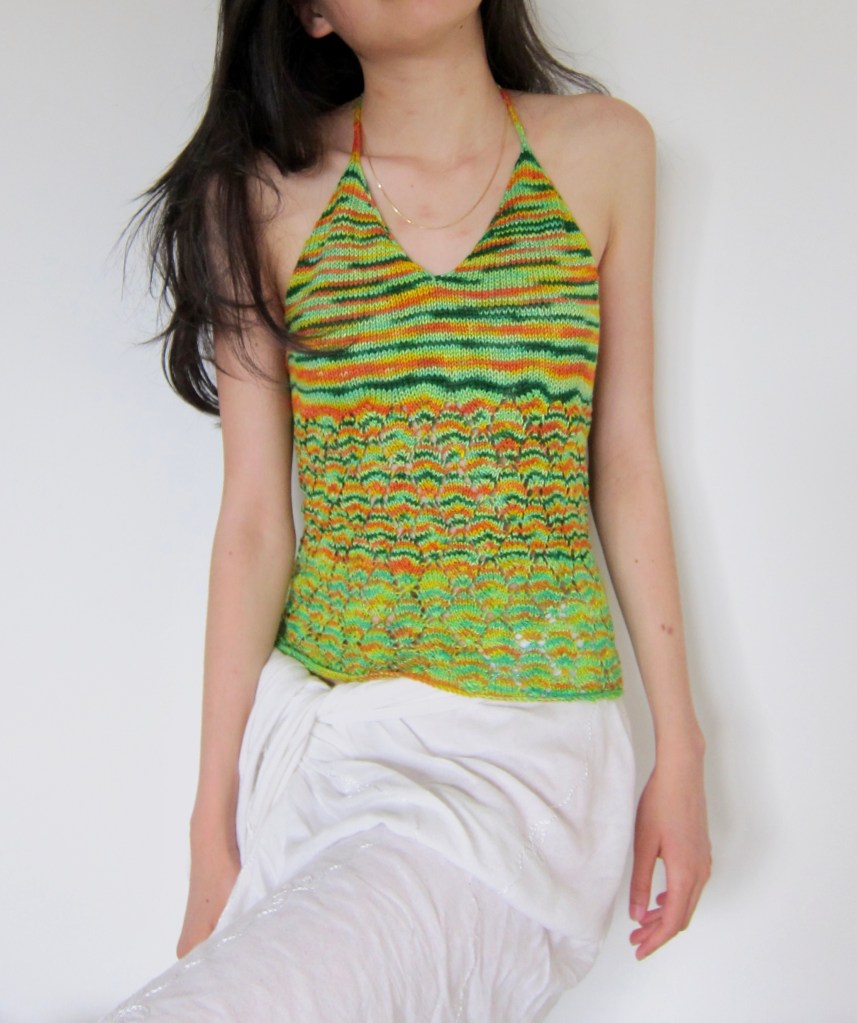
You can probably tell on my top that there is a yarn dye-lot change around halfway through the lace. The first part of the top has many deeper greens, while at the bottom of the lace the dark colors lighten up. This is because the two balls of yarn I used to make this top were dyed almost a year apart.
I received the first ball of this amazing yarn as a gift from a friend and immediately cast on this fun little top with it, not really thinking of how much yardage I had. When I ran out and searched online to buy another ball, I realized that the color I used was not longer available! As such, this WIP was left in my yarn basket for months and months, untouched.
A few months ago, I was going through my WIPS and rediscovered this top. I messaged the company to ask whether the colorway would be coming back — and, when I checked back on the website about a month after that, Unbe-leaf-able (the color I used in this Journey Recycled Silk yarn) was back! I bought the ball I needed, sped through the rest of the lace, and finally could write up the pattern for this lovely Leaf Halter.

If you saw the last pattern on my blog, you’ll recognize this yarn. If you haven’t, check it out! I used the leftovers from the Leaf Halter to make the Lace Bandana, and I think they’d be so cute together! I’ve been really into open stitches, lace knitting, and summer outfits lately, if you haven’t noticed 😉
Also – did I mention that my Leaf Halter used less than 400 yards of yarn? This means that for smaller sizes, this can be the perfect project for that stray hank of hand-dyed fingering weight yarn you’ve got lying around, and for larger sizes 2 hanks will be more than enough!

And without further ado, let’s just into this pattern:)
MATERIALS
2 skeins of Journey Recycled Silk Yarn (I used the Unbe-leaf-able colorway), or 400 – 600 yards of a fingering weight yarn, depending on how long you wish to make your top/what size you are generally in tops. For reference, my Leaf Halter took just under 400 yards and I am usually an XS-S.
3.25 mm circular knitting needles.
If you wish to use a different weight yarn, you can totally do that! Just make sure that your needle size corresponds to the weight yarn you are using.
MEASUREMENTS
This pattern utilizes a few of your body’s own measurements. You may measure as you come across the instructions in the pattern, or you may do all your measurements here and write down the numbers so that you can use them later on. Use inches or centimeters, but just stay consistent.
- Underbust measurement (this is right below your bust)
- Half of your underbust measurement (just divide the above by 2)
If any part of your body below the bust has a larger measurement than your underbust measurement (for example, if around your torso is wider than around your bust) keep in mind that you may encounter some unintended negative ease in the body of the top. You can counteract this by using the larger measurement in place of the underbust measurement.
Also note that if you intend for your top to go past your hips and your hips are considerably wider than your waist, you may have to add increases to the bottom of the lace section. The pattern has more details on how to do this, but does not give step-by-step directions for hip adjustment.
PATTERN:
To work this pattern, you start with making icord straps for the halter and then knitting each cup flat. After connecting them and joining in the round, the lace begins.
CUP (make two)
To make each cup, you start by knitting an icord that will be the halter tie and then increasing to form the triangles. This makes for a seamless transition between strap and cup.
(Note that if you want to add bust increases, which are not included in this pattern, the time to do so would be at step 7).
- Cast on 3 stitches.
2. Knit an icord to desired strap length. Keep in mind that this strap must tie around the neck. For reference, I knitted my strap to around 14 inches. IF YOU ARE DOING A TANK VERSION OF THIS TOP, MEANING THAT THE STRAPS DO NOT TIE BUT CONNECT TO THE TOP BACK HEM, I RECOMMEND USING THE PROVISIONAL CAST-ON METHOD SO THAT AFTER YOUR TOP IS FINISHED YOU CAN TRY IT ON AND ADD/RIP BACK STRAP LENGTH.
steps to knit icord: Knit across. Slip stitches back onto the left hand needle. Repeat last two steps.
Once your icord has reached desired length, continue onto next steps.
3. Knit across.
4. Slip first stitch purlwise (with yarn in front). Purl the rest of the stitches across.
5. Slip first stitch purlwise (with yarn in back). M1R. Knit until last stitch. M1L. Knit the last stitch.
6. Repeat steps 3 and 4 until triangle reaches the desired width (put the triangle against your chest to measure). End on a purl row.
7. If the triangle has also reached your desired length, you can stop here and move onto step 8. If you would like more length, repeat rows 7A and 7B until your triangle reaches desired length as well.
7A: Slip first stitch purlwise (with yarn in back). Knit across.
7B: Slip first stitch purlwise (with yarn in front). Purl across.
8. Leave stitches on hold, preferably on your needle cord. Cut yarn.
Make a second triangle. DO NOT CUT YARN.
JOINING THE CUPS
- Now you are going to knit across both triangles. Make sure your knitting is oriented so that you are are on the right (knit) side and not the purl side. Slip the first stitch purlwise (with yarn in back) and knit across one of the triangles. Then, simple continue knitting across the next. This should connect the two triangles.
2. Slip first stitch purlwise (with yarn in front) and purl across both triangles.
Now, measure the bottom length of the triangles. If this number is equal or more than half of your underbust measurement, go onto the next section. If this number is less than half of your underbust measurement, follow steps 2A, 2B, and 2C below.
2A. Figure out how much length you need to add to the bottom length of your top to match half of your underbust measurement. Divide this by 2 and call the number X.
2B. You should be on a right side row. Backwards cast on stitches for length X and knit across.
2C. You should now be on a wrong side row. Backwards cast on stitches for length X and purl across. Now the length across the bottom of the top should be half of your underbust measurement. Move onto the next section.
THE BODY
- Count how many stitches are on your needles. Y is the multiple of 10 closest to this number. (For example, if you count 56 stitches, Y is 60). Note that if you want a looser top, you can round to the higher multiple of 10, and if you want a more fitting top, you can round to the lower multiple of 10).
- Backwards cast on Y stitches. Now, you will start working in the round. Place your beginning of round marker.
2. Knit in the round for about 2 inches (I did a little bit less, to have the lace start higher up).
3. It is time for the lace! I followed this stitch pattern from Easy to Knit: https://www.easytoknit.com/2021/06/eyelet-lace-107-in-round.html#google_vignette
4. Work the lace stitch pattern above until top reaches desired length.
Note that in the measurements section I mentioned that if your waist and hip have very different measurements and you want your top to go past your hips, you may want to increase your stitch count once you get to hip-length. I would simply place some M1Rs in the back of your top and make a stockinette column to widen your top. If this sounds too complicated to work out, maybe revert to stockinette to do your increases.
If your measurements aren’t too wildly different, even just doing a loose cast-off could work to make a long top that fits your hips! And if your top doesn’t go past your hips, you don’t even have to worry.
5. Cast off (loosely if your waist-hip measurements are close together or if your top doesn’t reach your hips, and LOOSELY if your waist-hip measurements are further apart and your top goes past your hips)
Weave in ends.
TANK TOP OPTION
If you would like for your top to be a TANK TOP and not a HALTER TOP:
Pick up stitches from your provisional cast on, try on the top, and either add/rip back rows to achieve the perfect strap length.
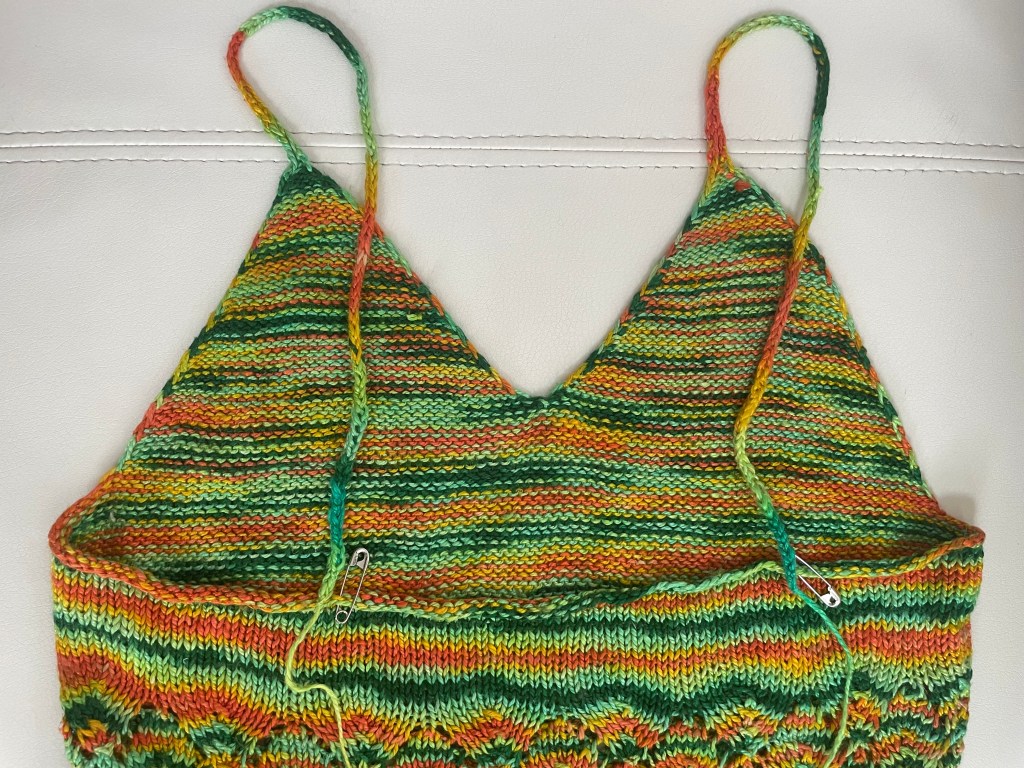
Then sew the ends of the strap icords to the back cast-on edge. I have included a photo below.
I myself have chosen to make my top a convertible top — I can either tie the straps around my neck for a halter or attach the ends of the straps to the body of the top with safety pins!
And it’s finished! Your Leaf Halter/Tank Top is ready to wear!
I hope you enjoyed knitting this beauty up as much as I did. The combination of lace and colorful yarn made this an impossible-to-put-down kind of project for me, and now I will be wearing it all summer long.
Happy Knitting!

Leave a comment