
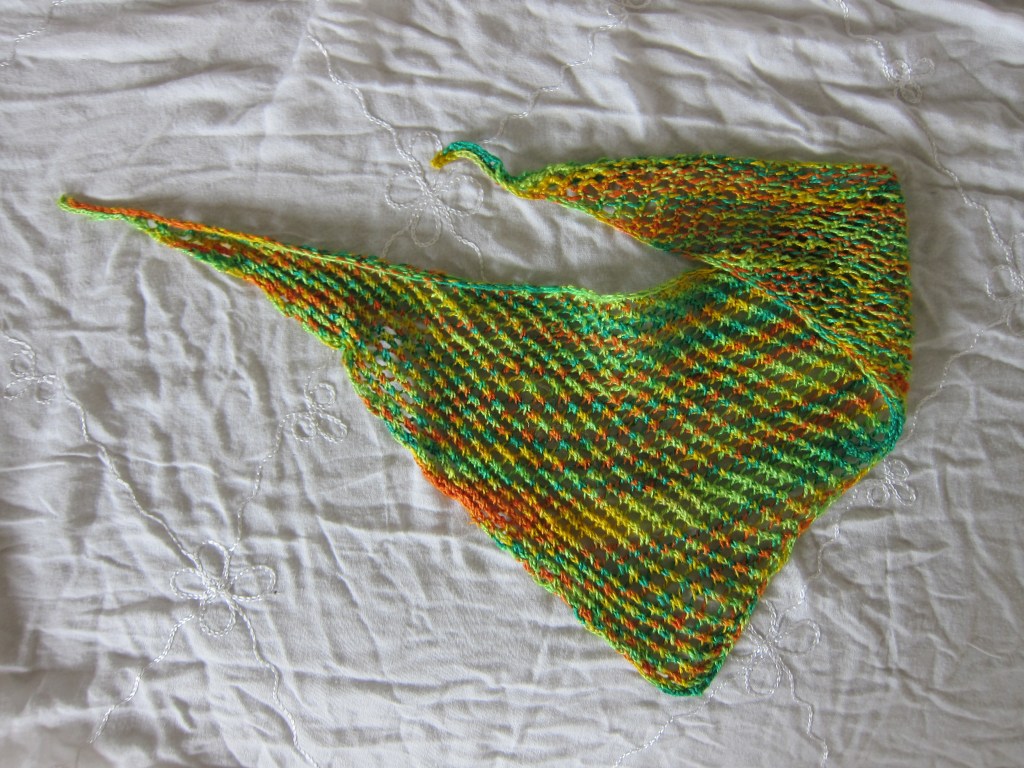
My first official summer accessory pattern of the year is here! Meet the Lace Bandana — a summery mesh design that is the perfect addition to any warm-weather outfit.
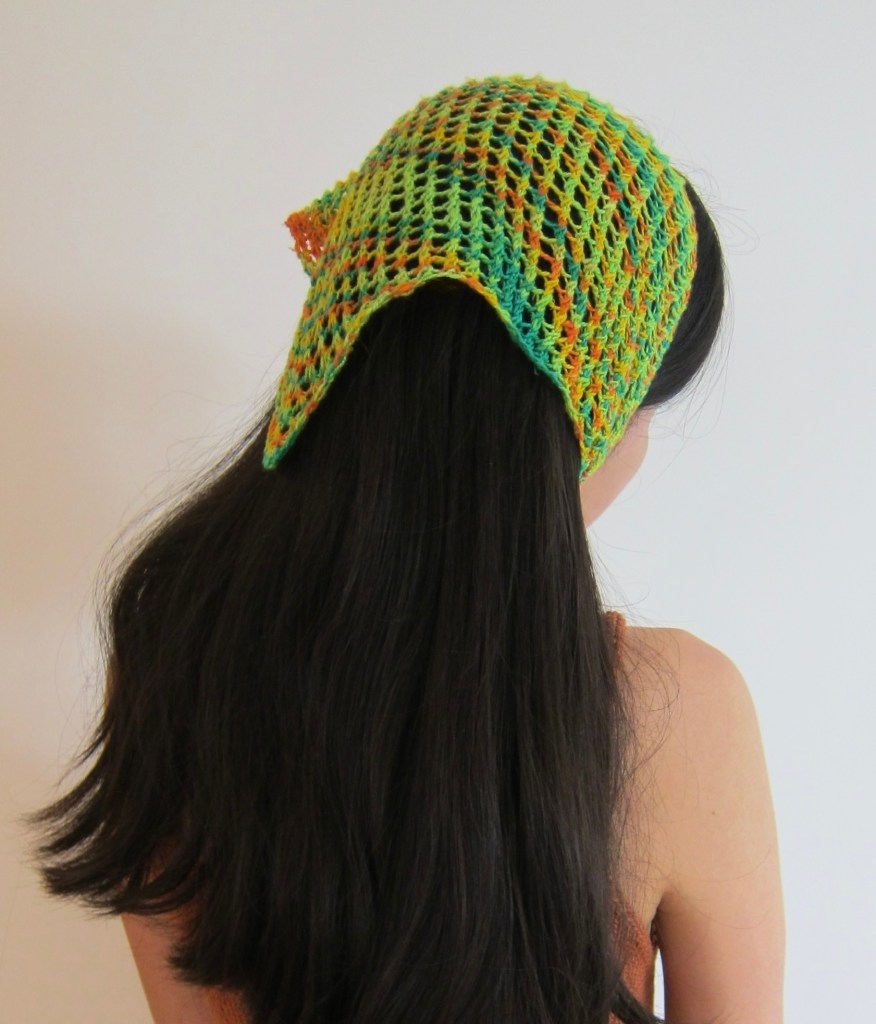
I rediscovered bandanas this year when looking for an alternative to tying my hair up. I hate having my hair in my face, but sometimes I’m not in the mood for a ponytail, or my buns aren’t turning out in that perfect-messy-bun way. Bandanas are the perfect solution! I get to keep my hair down and relaxed but still prevent any bothersome strands from getting in the way.

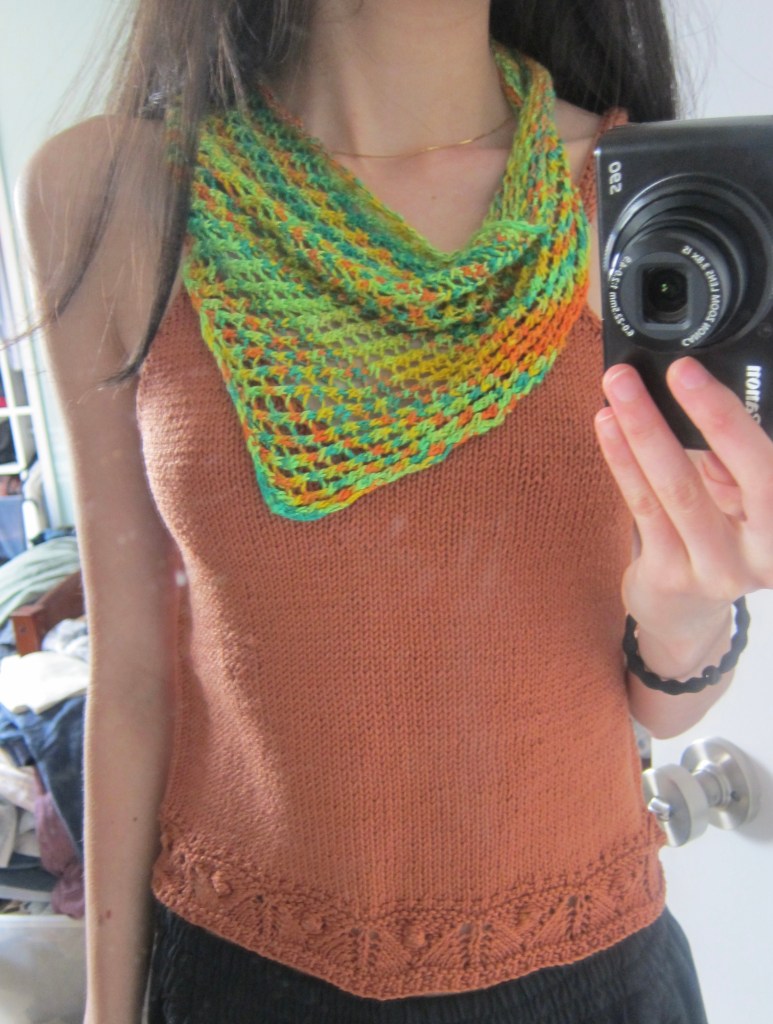
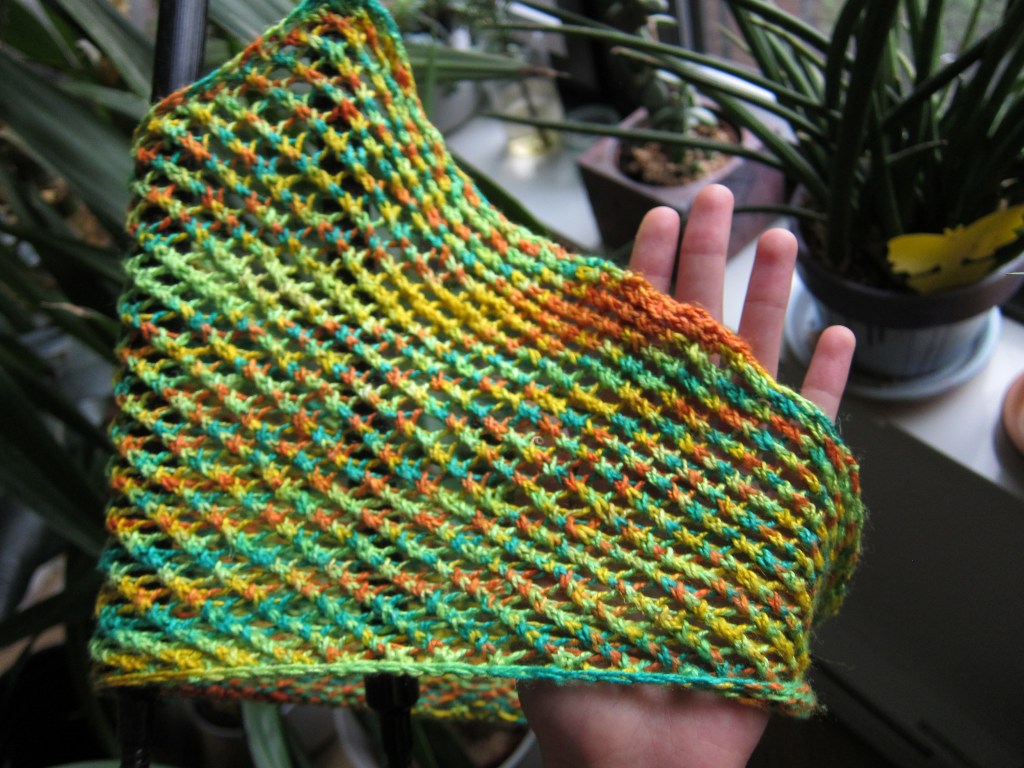
Alternatively, you could use this bandana as a neck scarf! I love the mesh look, especially in this fun yarn I chose… (more about that later ;))
This pattern is the PERFECT first lace project for a beginner knitter. Using only yarn over and knit-2-togethers, you will be astounded at how a beautiful pattern such as this can create such a versatile and unique looking fabric. Plus, the mesh aspect of this pattern makes it SO QUICK to whip up. I made mine in a matter of days — in total, probably only a few hours!
Note, however, that due to the nature of this mesh stitch your bandana may come out with a slightly ASYMMETRICAL NATURE. I don’t mind this at all and didn’t correct for it (as is detailed in the pattern), but instead just tie mine slightly to the side! The pattern has directions for how to counteract the asymmetry if it’s not your cup of tea, of course.
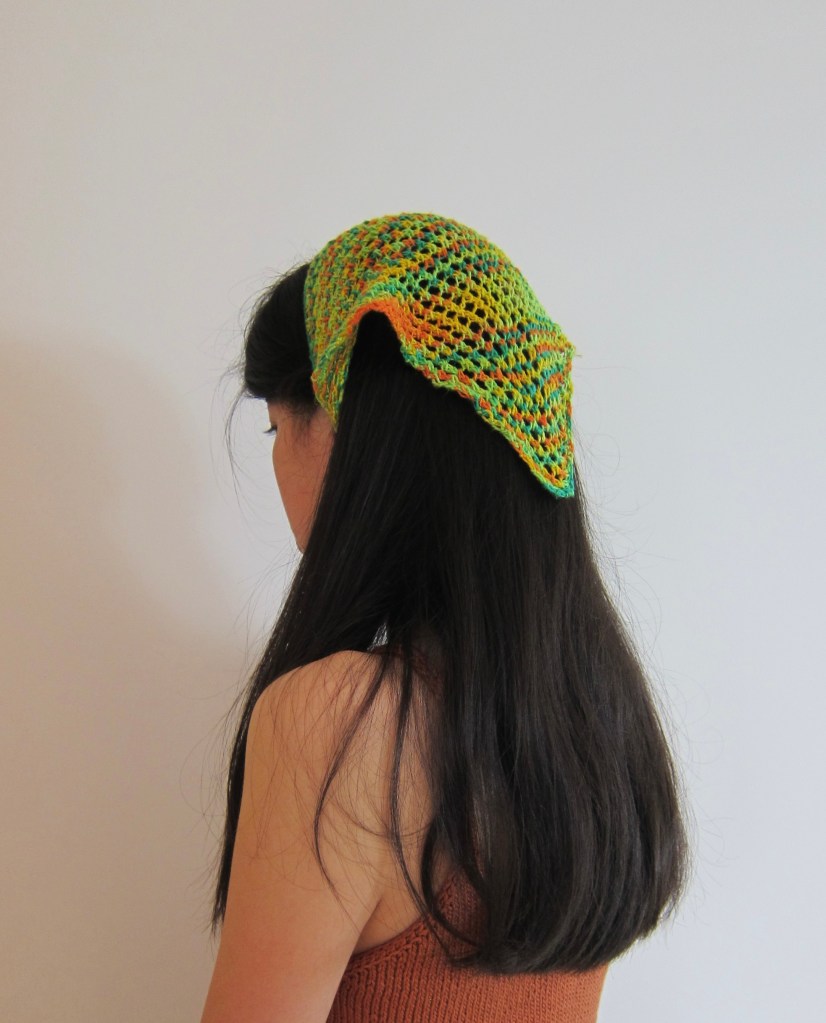
When creating this bandana, I was looking for the perfect ratio between length (from tie-tip to tie-tip, the wingspan if you will) and depth (how far it goes down the back of your head). I found that creating a perfect triangle often ended up with either a perfect depth but a length too short for the ends to properly tie in the back, or a perfect length for tying but a depth that extended all the way to nape of the neck, which I disliked.
The solution? The mesh stitch is one component. Unlike traditional stockinette or another close-knit stitch pattern, the mesh opens up and acquires more length than width per 2-row repeat.
To really create the perfect shape, I decided in the last few rows to increase more rapidly outwards, stretching out the triangle construction and creating longer ties. The result? A perfect bandana!

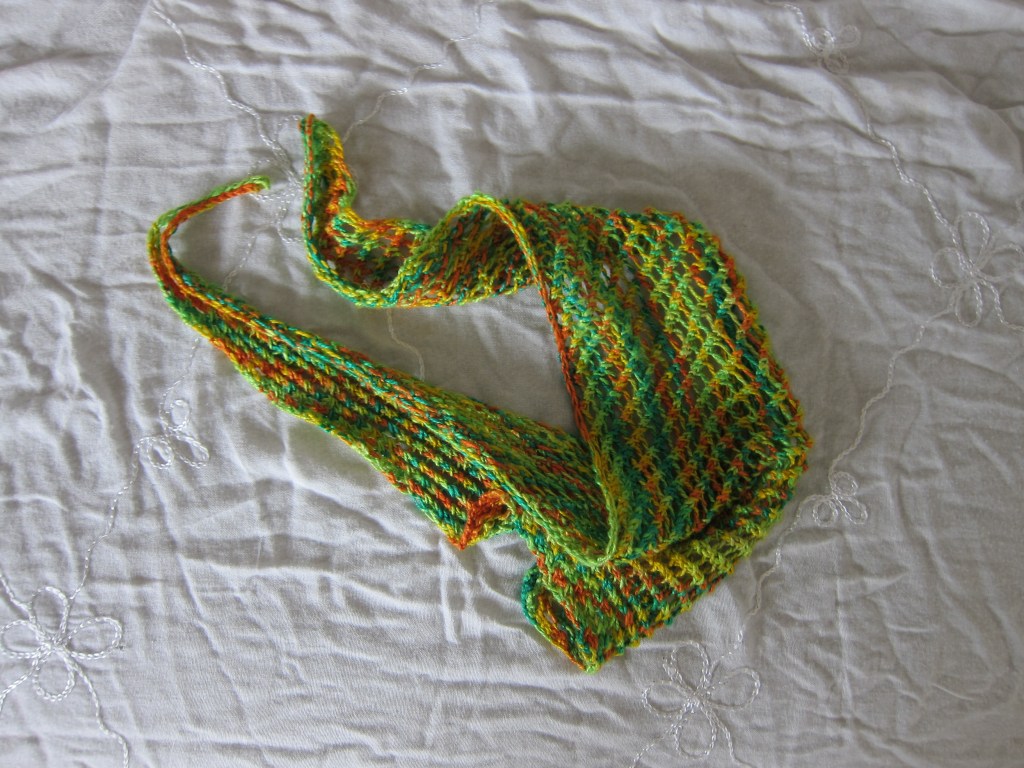
Now let’s take a moment for the yarn. For this project I used leftovers of Darn Good Yarn’s Journey Recycled Silk Yarn in the color Unbe-Leaf-Able, which is this lovely, summery combination of green, orange, and yellow. Journey is a recycled sport weight silk yarn, with a dry and soft feel. I adore this yarn! Watch Joy2Create this summer for more upcoming patterns and, hint hint… many of them using Darn Good Yarn silk. Not affiliated whatsoever, but here’s a link if you want to check it out!
Now, let’s move onto the FREE pattern, shall we?
MATERIALS
Less than one skein of Journey (or any yarn alternative! I would recommend a lace/fingering/sport weight, but DK could also work)
3.25mm knitting needles
KNITTING SKILLS and ABBREVIATIONS
CO (cast on)
Backwards loop cast on (look up a tutorial for this skill)
K (knit)
P (purl)
YO (yarn over)
K2TOG (knit 2 together)
Cast off
PATTERN
- CO 3
- P3
- K1, yo, k1, yo, k1
- P across
- K1, yo, k1, yo, k2tog, yo, k1
- P across
- K1, yo, k1, [yo, k2tog] across until last stitch, yo, k1
- P across
- Repeat rows 7 and 8 until bandana reaches desired depth
- After a purl row, backwards CO 5 stitches
- Turn, knit 5 stitches, then knit in pattern (row 7) across
- Backwards CO 9 stitches
- Turn, purl across
- Backwards CO 4 stitches. IMPORTANT NOTE: Some yarns, when knitted in this mesh pattern, tend to stretch a certain direction. Therefore, I would here do a practice tie of your bandana and see where the triangle tip lies. If it doesn’t lie in the center of your head, cast on more stitches on the edge that needs to be elongated so that it is centered.
- Bind off LOOSELY (on a knit row)
And that’s it! The accessory of the summer is finished! I would highly, highly recommend BLOCKING this project — it helps the mesh stitches open up and the shape of the bandana spread out as well! Simply soak the bandana in warm water, then lay it out on a towel in the shape you want it to dry. You can tug a little bit to even out the ends!
I hope you enjoyed this little pattern, whether it was your first introduction to lace knitting or you’re a seasoned knitter looking for a simple project to spice up your summer. I certainly loved making my bandana and will be whipping up many more 🙂
Watch this space — summer knitting (and writing summer patterns) has just begun!
Happy Knitting!

Leave a comment