
Summer should never put a damper on your making life- especially when there are summery tops waiting beyond your hook! This pattern is for the absolute beginner, meaning that it is your perfect first raglan top. It is worked top to bottom with the simplest of stitches and construction. After you’ve made your first, you’ll want to make a whole closet more!
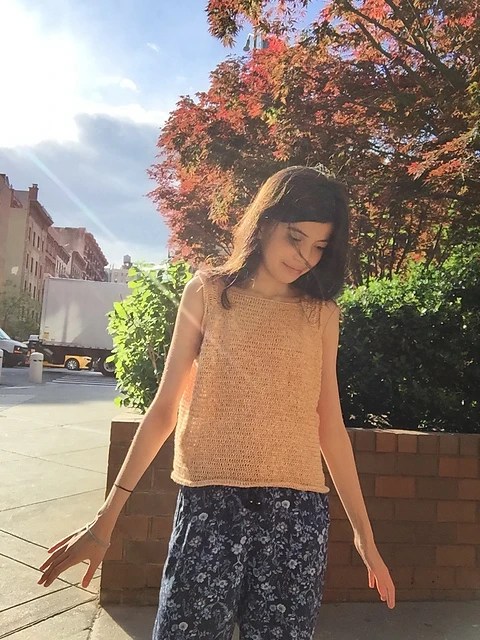
This top can be paired effortlessly with a long sleeved blouse, flowy pants, and of course a floppy sun hat 😉
I love how versatile this top is- and how it’s completely customizable! Yup, you can alter the neckline (low or high), the arm holes (loose or tight), the length (long or short) and even the sleeves (sleeve… or not?)
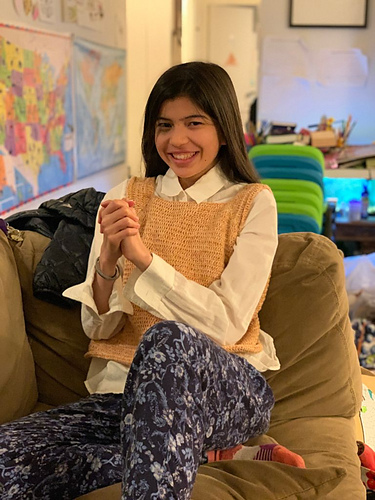
I chose a high neckline with tight arm holes, a medium length (not crop, not tunic) and no sleeves at all for a chic looking tank the color of the sun rise.
And now let’s talk about yarn…
I used a linen-cotton blend called Bel Viso 05, in the colorway Juliet. This yarn is usually 26.25 for one skein (you’ll need 1.5 skeins for this top) but I got it on sale at my local yarn store… for on 5 dollars! I love discount yarn shopping because you can get high-quality yarn for only a few dollars. This yarn is definitely one of my favorites, but I completely understand if it isn’t affordable. So, you can use alternatives! Because of the customizable nature of this pattern, you can use any yarn… ANY YARN!!!
For a summery feel (light and airy) I’d recommend something lightweight, like linen or cotton (or a blend.) Cotton and acrylic blends can definitely be affordable, so I’d check out Lion Brand’s Comfy Cotton for a cheaper alternative. (Note: I am NOT sponsored by ANY brand, so don’t worry, all these opinions are my own and will always be!) I prefer higher quality materials as opposed to synthetic fibers, but these usually stretch the wallet, and acrylic brings down the price point, so yarns like Comfy Cotton may be a good choice.
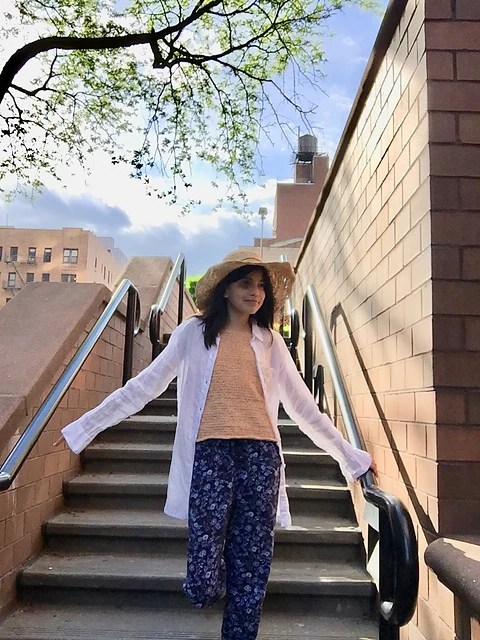
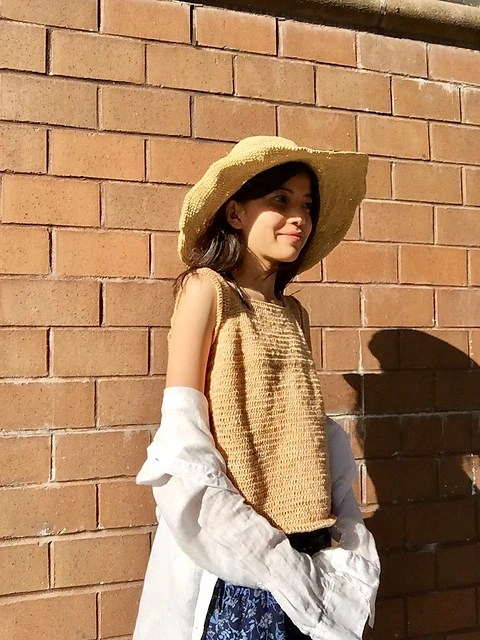
In the photo above I’m wearing a white linen blouse on top of my tank. I love this look because it makes me feel so beachy and yet sophisticated! The blouse protects my skin from the sun when I’m in a hot spot, but to cool down I like to tie it around my waist and strut around in the tank’s fully glory.
Like here:
Let’s now take a little look at the little details that make this tank so unique.
One: the neckline. I absolutely love this neckline. Most raglan tops are round, meaning that they often have either little holes or visible increases. I wanted to make a square neckline that had some charm of its own. It took a few tries, but I finally came up with a solution that is so easy it will blow you mind!
This WHOLE raglan is made only of chains and double crochet! Even the neckline! By putting multiple double crochet stitches in the corners, I created a perfectly rectangular neckline with flowery shapes coming out. Here’s a picture to show you:
Another little thing is the side. It’s really nothing, but I love it so much. Since you can customize your raglan, you can choose how big or small you want the arm holes to be. I modelled mine after a running tank which had smaller armholes.
I love how all the elements of the top come together so nicely – even the curl at the bottom of the top! You can eliminate this easily and quickly by BLOCKING your work (wetting it and pinning it to dry, for example) but I thought the little curl gave this top so much character and charm, so I kept it.
What do you think? Will you block your work or keep it nice and curly? 😉
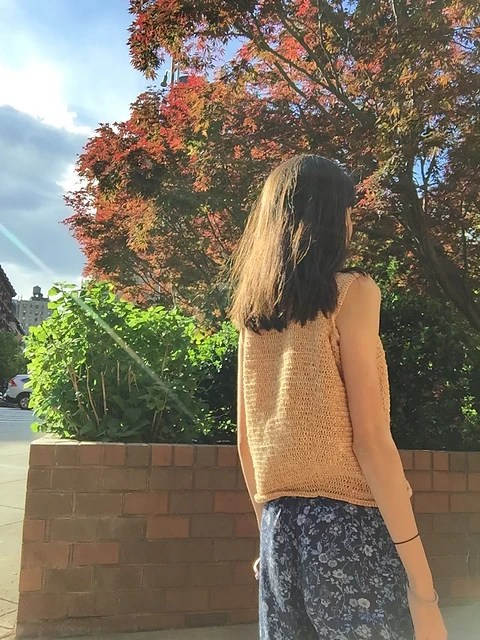
And what would a top be without seeing a picture of it from the back? So, here’s one I took for you. I promise, after this we’ll get into the free pattern…
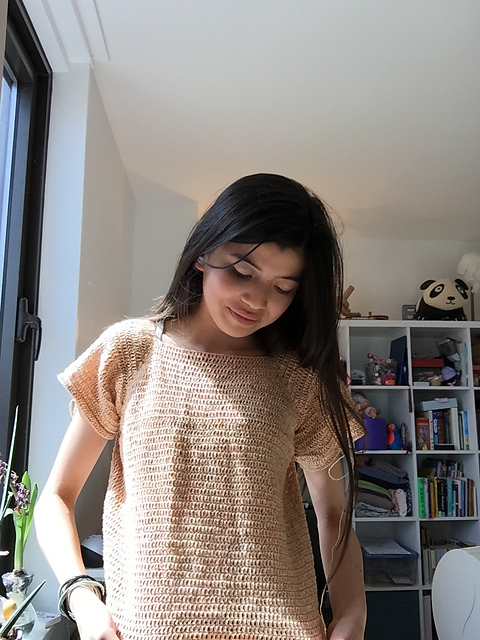
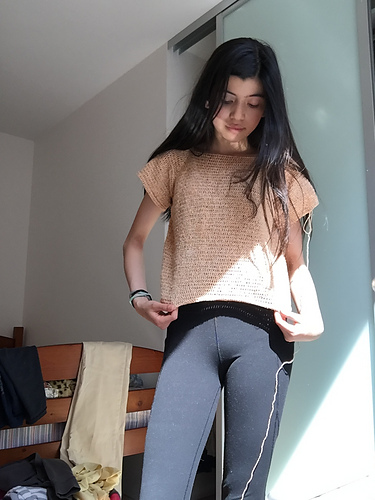
Or maybe we’ll get into the free pattern after just one more. I promise! But I wanted to show you how this top would look as a crop. it really is SO versatile. I even think it would look stunning as a loose beach cover-up dress! If anyone decides to do a little spin on this pattern, please message me. I’d LOVE to see what you came up with!
Ok, that was it. Let’s get into the pattern.
Grab your yarn, hook, and a cuppa whatever you want— haha! I like to drink tea, but if coffee’s your cup of tea, go ahead and grab that! (Puns intended)
Again, the yarn I used was Bel Viso 05 in colorway Juliet, a stunning blend of cotton and linen the color of sunset, but other blends would be fine, too. This pattern is customizable, so bring on the yarn, any kind!
Hook size depends on what yarn you’re using, so I’m leaving that up to you. I always like to size down on hooks because I crochet loosely and love a tight-knit fabric – though for this pattern I used a looser hook because I really wanted this top to be nice and flowy.
Cuppa depends on what you like to drink.
And… and… and…
The pattern! Let’s do this.
PATTERN: Sunny Summer Raglan Top, FREE Crochet Pattern
- Chain a multiple of 6 that first comfortably around your neck. This will be the neck opening, so make sure it is big enough to fit around your head. Less chains = smaller neck hole, more chains = larger neck hole
2. Add 4 chains.
3. Sl st to first chain.
4. Take the multiple of 6 that you chained in step 1 and divide it by 6. Call this number x.
5. Chain 3.
6. Dc in next 2x stitches. (Multiply x by 2 and dc into that number of stitches.)
7. 5 dc into next stitch.
8. Dc into next x stitches.
9. 5 dc into next stitch.
10. Dc into next 2x stitches.
11. 5 dc into next stitch.
12. Dc into next x stitches.
13. 5 dc into next (last) stitch.
14. Sl st to last chain of previous chain 3.
15. *Chain 3.
16. Dc across until you reach the third dc of your first 5 dc (the corner.)
17. 5 dc into that corner.
18. Dc across until you reach the next corner.
19. 5 dc into that corner.
20. Dc across until you reach the next corner.
21. 5 dc into that corner.
22. Dc across until you reach the last corner.
23. 5 dc into that corner.
24. Dc until you reach the chain 3.
25. Sl st to the last chain of chain 3.*
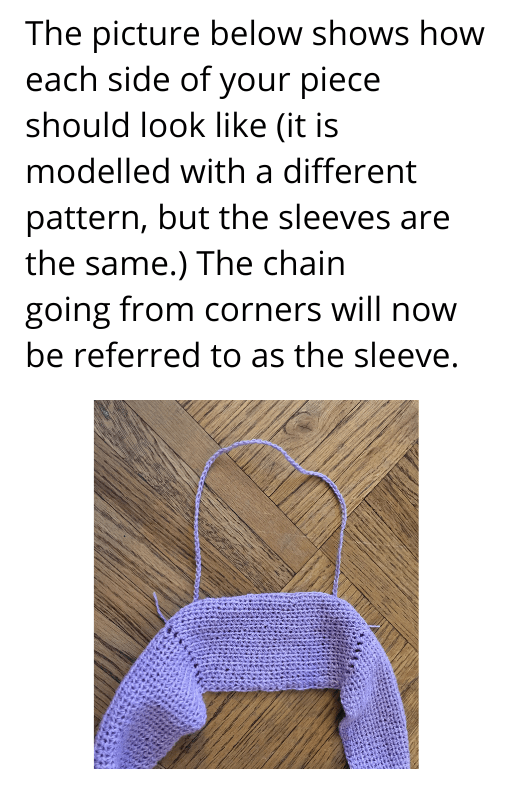
26. Repeat * – * (steps 15 – 25) until you are satisfied with the width of your straps. This shape should begin to look like the picture below:
27. Fasten off. (Chain one, cut yarn, pull end of yarn so that chain one becomes a taut knot.)
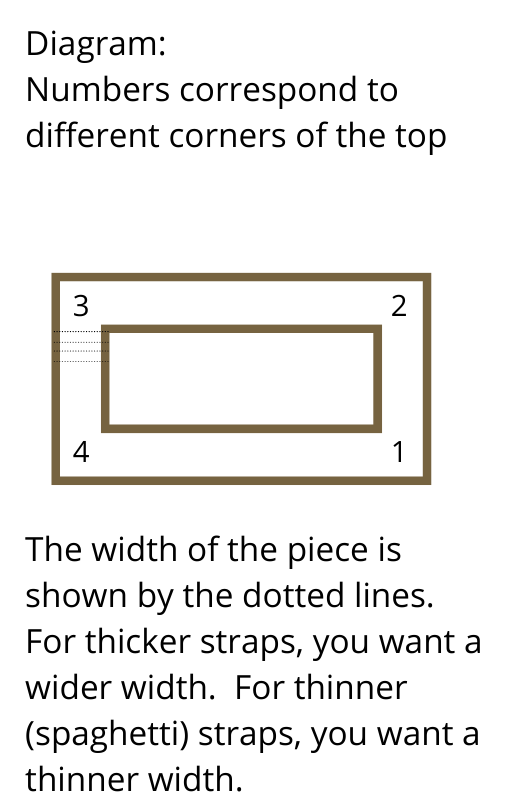
28. Knot your yarn in corner 1 (see diagram for assistance.)
29. Chain any number of chains (y) that you want the bottom of your arm-hole to be. You can choose between a looser arm-hole (more chains) or a tighter arm-hole (less chains). If you’re having trouble finding a starting number, start with 3x (multiply x by 3.)
30. Sl st to corner 2 (see diagram for assistance.)
31. Fasten off.
32. Knot your yarn in corner 3 (see diagram for assistance.)
33. Chain y chains.
34. Sl st to corner 4 (see diagram for assistance.)
35. Now we are going to start forming the body of the tee. Without fastening off, turn your piece and dc in every stitch from corner 4 to corner 1.
36. Dc across the chain from corner 1 to corner 2 (sleeve) (y stitches.)
37. Dc in every stitch from corner 2 to corner 3.
38. Dc across the chain from corner 3 to corner 4 (sleeve) (y stitches.)
39. Sl st to first dc of round.
40. Chain 3.
41. Dc from corner 4 to corner 1.
42. Dc across chain from corner 1 to corner 2 (sleeve).
43. Dc from corner corner 2 to corner 3.
44. Dc across chain from corner 3 to corner 4 (sleeve).
45. Sl st to last chain of previous chain 3.
46. Repeat * – * (steps 40 – 45) until you reach the desired length of your top. Less rows = crop top, more rows = tank top, many rows = loose shapeless dress
47. Fasten off, weave in ends.
That’s it! I hope you enjoyed this easy crochet pattern. Check out my blog and Etsy shop for more!
Happy Crocheting!

Leave a reply to 12 Crochet Square Neck Top Ideas – Cloudy Yarn Cancel reply