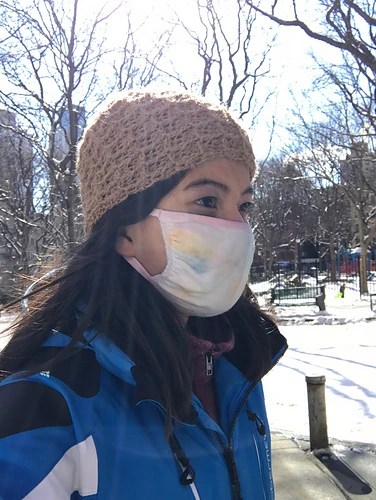
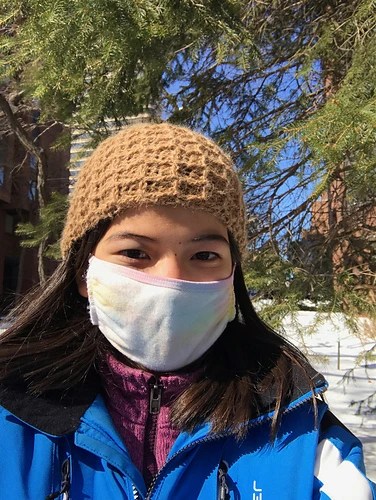
The waffle beanie is such a chic pattern! It has great texture and stretch, and can work as a unisex hat. Trust me, you’ll be wearing this one everywhere!
This hat would be great for winter and autumn months. It’s lightweight and warm at the same time!
I love the amazing texture this hat has. It’s fancy and simple all at once, meaning that you can wear it on a date or a casual walk.
Are you ready to get your hands on this pattern? I sure am!
The materials are easy. Any medium-weight yarn will do- no fingering yarn or overly chunky yarn. Sorry about the vague yarn directions- I don’t know what kind of yarn I used because it was unwound and didn’t have a tag, but here are some kinds that I think would work really well:
Note: I am an Amazon Associates Partner, meaning that I may get a small commission on anything you buy. This will help support my blog so that I can keep up the free content! 🙂
As for hooks, I’d use a size that corresponds with your yarn. If you’re using the yarn listed above, I’d use a size five (approximate.)
This hat has a LOT of stretch, so if when you’re making it and you think it looks small, do not worry! This hat has the capacity to fit anyone!
The waffle beanie is worked flat and then seamed, so that makes it easier. It is made by doing the waffle stitch until the desired length, then seaming the edges together and sewing the top of the hat shut. (more details on this later.)
For this stitch, you will need to know how to double crochet. Double crochet (dc) : yarn over, insert hook into stitch, yarn over, pull through stitch, yarn over, pull through next two loops on hook, yarn over, pull through last loops on hook. (Youtube is a great resource if you need a video tutorial.)
I will provide a video on the waffle stitch later on in the pattern. Keep in mind that in the video, I am using 12 stitches, but you will be working with more. Also keep in mind that in the end of the video, I show you how to end your waffle stitch- however, this is only for dishcloths, so disregard the last row of double crochet.
FREE PATTERN for the Waffle Beanie
- Ch 40
- Follow tutorial below on waffle stitch until your piece reaches 17 inches long. (Follow everything in the video except for the last row, where I show you how to end a dishcloth. You will not do a last row of double crochet, you will end with the waffle stitch. Also note that I start with a chain of 12, whilst you will be starting with a chain of 40, so the beginning of the video where I chain 12 is not relevant unless you want to learn more about the waffle stitch.)
3. Once your piece reaches 17 inches, DO NOT FASTEN OFF. With hook still attached, fold piece in half lengthwise, wrong side facing out. The video shows you which side is the wrong side, but in case you missed it, it is the opposite side of the one where you can clearly see squares (waffles) rimmed by outer stitches.
4. Slip stitch across the open side of your fold, forming a small cowl/infinity scarf shape.
5. Fasten off.
6. Keeping hat inside-out, thread a needle with the same yarn as used for waffle stitch and weave in and out of the open top of your hat. You should be going around so that when you reach the end, you can pull the yarn and your hat will close like a drawstring bag. Tie ends so that hat stays closed at top. If you’re having trouble with this step, look at this tutorial:
7. Flip hat inside out. You are finished!
I hope you enjoyed this pattern as much as I enjoyed creating it for you! I’d love to see pictures of your waffle beanies, so feel free to contact me with those or questions. Comment below what you thought of this pattern!
Happy Crocheting!

Leave a reply to 1 Skein Crochet Projects – Joy 2 Create Cancel reply