

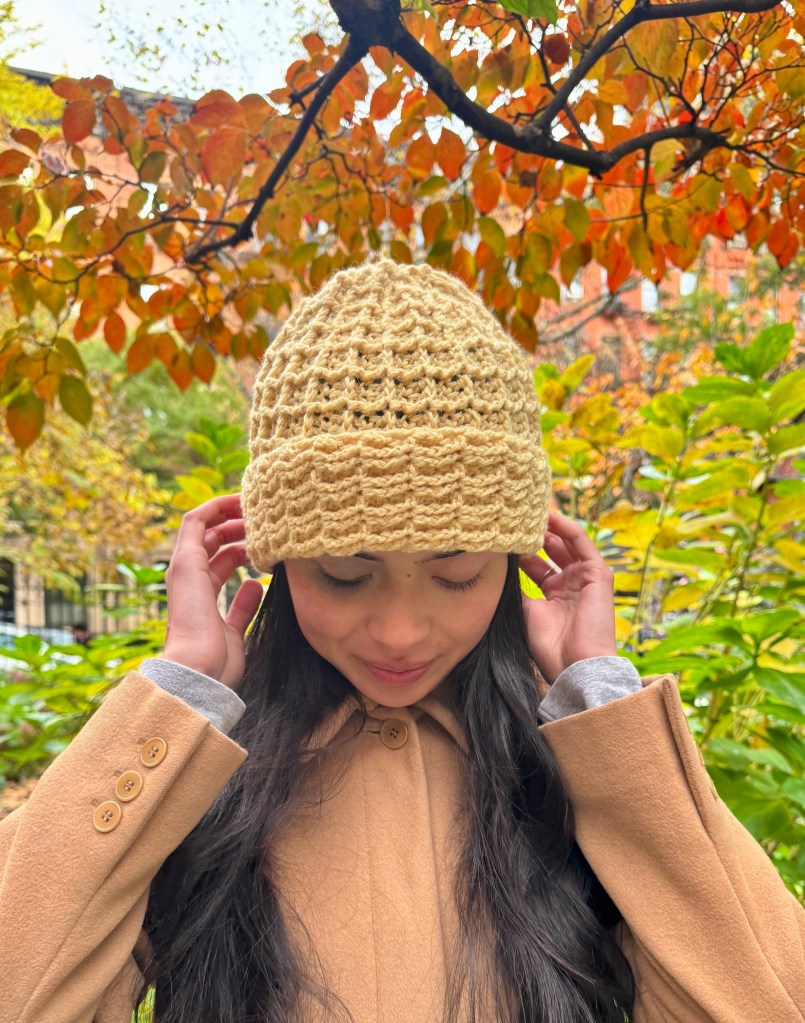
This month’s free crochet pattern combines texture with simple construction to make a beanie you’ll be wearing all winter long. Meet the Honeycomb Hat!
This pattern isn’t entirely new to my blog. A couple of years ago, I published a free crochet pattern for the Waffle Beanie (see below). The beanie I crocheted for that pattern was later sold at a craft stand, so I decided a few weeks ago that it was time to crochet another one!
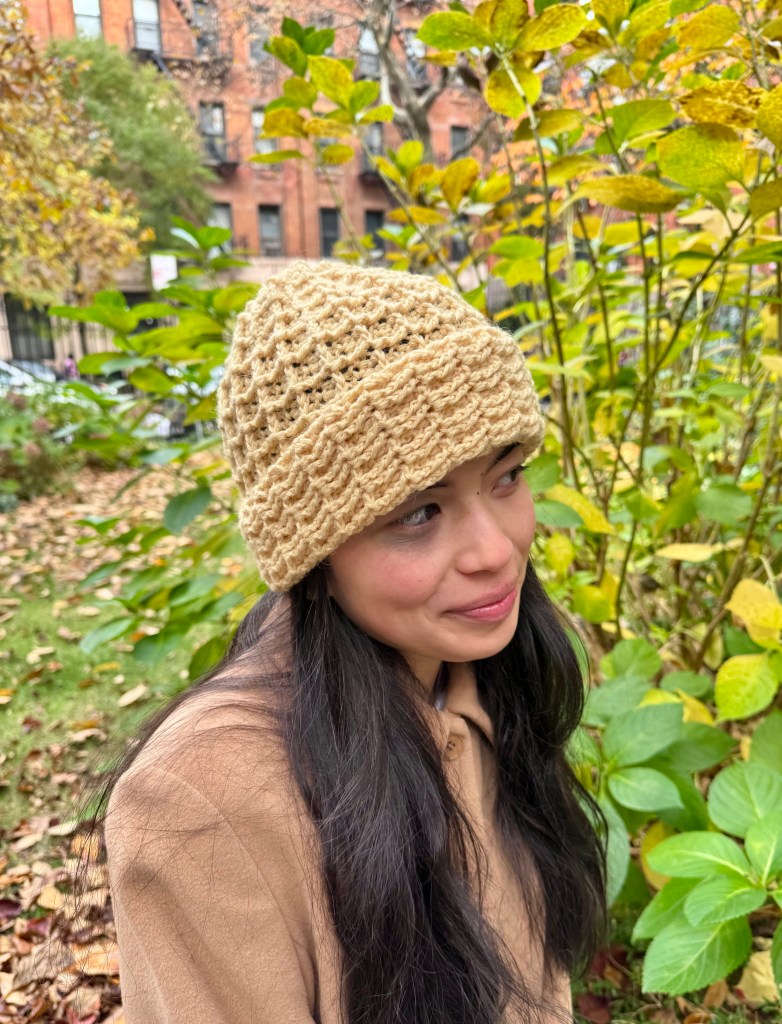
I grabbed a skein of this stunning butter-yellow yarn and started following the pattern, adding some modifications along the way (a more tapered top, a fold-up brim). When I finished my beanie, I decided that it was about time to give the Waffle Beanie pattern an upgrade. So the Honeycomb Hat is essentially the Waffle Beanie 2.0, written in an easier-to-read style with a few fit adjustments! (Plus: I made a video tutorial to go with it, so this pattern is completely accessible to beginners). I hope you love it as much as I do!

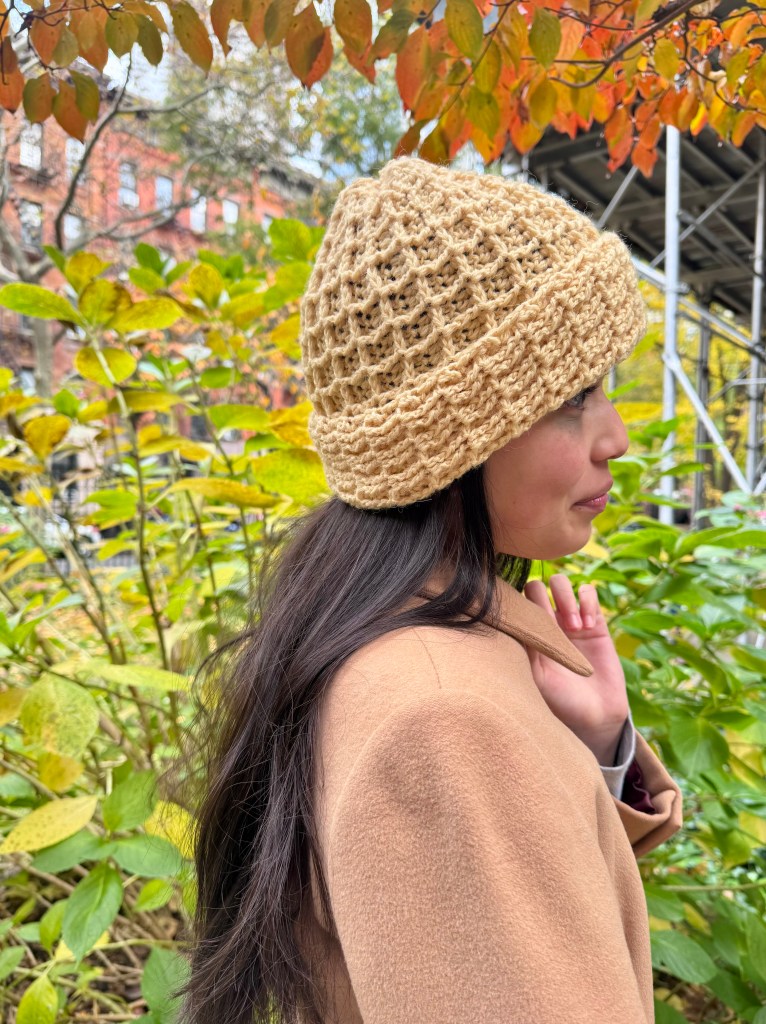
The Honeycomb Hat, like its predecessor (the Waffle Beanie), is worked up in the addictive waffle stitch. Although it looks complex upon first glance, the waffle stitch is actually a super simple stitch to learn. I would definitely recommend this project to adventurous beginners who are looking to branch out from plain old single crochet and double crochet!

Can we also talk about the name of this hat for a moment? As soon as I saw the waffle stitch paired with this yellow color, I knew what this hat would be named. The yarn I used for this hat was actually from a yarn swap, so I don’t know the exact details, but it feels like a wool-alpaca blend, which is very close to the material I used for the original Waffle Beanie. I held two strands of this fingering-weight yarn to make a DK weight, and at the end I weighed the hat so I could provide yardage estimates for you guys!
The yarn swap event was actually hosted by my local yarn store, and it was the greatest experience! Everyone brought in skeins of yarn that they were no longer planning on using, and everyone traded. It was a lovely event and a great chance to chat with other knitters/crocheters. I hope the yarn store will host more events like it in the future! If you have been wanting to find more knitters/crocheters in person, I highly recommend looking into your local craft stores to see if they host any community events like this 🙂
Back to the Honeycomb Hat, now. This pattern is absolutely addictive to work up, and it goes by so quick with DK weight yarn and a 5mm hook. This would make the perfect gift for the upcoming holiday season!
And, without further ado, let’s dive into the pattern!
MATERIALS
350 yards DK weight yarn (or fingering weight yarn held double, which it what I did!) My hat ended up weighing almost exactly 100 grams.
5.0mm/H crochet hook
Tapestry needle
STITCHES USED and ABBREVIATIONS
Chain (ch)
Double crochet (dc)
Front post double crochet (fpdc)
Single crochet (sc)
Front post single crochet (fpsc)
VIDEO TUTORIAL
If you learn better visually, this is for you! I’ll add timestamps throughout the pattern so you can follow along.
PATTERN
- Chain 48. (Alternatively, you could chain any multiple of 3 stitches. The length of your chain is how long your hat will be, so if you want a tall folded brim, you want to chain more, but if you want a short beanie with no brim, perhaps chain less stitches).
- Ch 1 for turning, turn, dc across
- Ch 1 for turning, turn, dc, *fpdc, dc 2*, repeat * – * until last 2 stitches in row, fpdc, dc
- Ch 1 for turning, turn, dc, *dc, fpdc 2*, repeat * – * until last 2 stitches in row, dc 2
- Ch 1 for turning, turn, dc, fpdc, *dc 2, fpdc*, repeat * – * until there are 4 honeycombs (or alternatively, 13 stitches) until the end of the row (there should be visible squares in your work — if you chained 48, like I did, there will be 15 squares; these are our honeycombs), sc 2, *fpsc, sc 2*, repeat * – * until last 2 stitches in row, fpsc, sc
- Ch 2 for turning, turn, sc, *sc, fpsc 2*, repeat * – * 3 more times, *dc, fpdc 2*, repeat * – * until last 2 stitches in row, dc 2
- Repeat rows 3 – 6 until hat reaches desired width. You can check this by wrapping your rectangle of fabric around you head (the side with the single crochets should be slightly tapered, that is the top of the hat – make sure your orientation is correct). Make sure that the ends can touch (and account for stretch)!
- Fold rectangle in half lengthwise and wrong-side out (you can choose which side is the wrong side in this stitch, but the technical right side is the one where each honeycomb goes inward), then slip stitch sides together. This is the technique I use in the video, but alternatively you could cut the yarn here (making sure to leave a long tail) and use a tapestry needle to seam the sides together. Fasten off and cut yarn, but make sure to leave a long tail.
- You now have a tube of fabric. One side should be slightly tapered from the single crochets. This should be the side where your long tail from seaming is hanging, but if it’s not, cut a new piece of yarn and start the next step at the tapered end. Use a tapestry needle to weave yarn in and out of the open top of your hat. You should be going around so that when you reach the end, you can pull the yarn and your hat will close like a drawstring bag. Tie ends so that hat stays closed at top.
If you’re having trouble with this step, look at my video tutorial (linked above). If you would like a longer and more detailed video of this particular step, check out the tutorial (not mine) below:
10. Turn hat right-side out. You’re finished!
I hope you enjoyed crocheting this hat as much as I did. I find the waffle stitch just so addicting! This will definitely be my go-to beanie for the winter months, and I have plans to whip up a few more to gift for the holidays!
Happy Crocheting!

Leave a comment