

We are well and truly into fall, and I am LOVING it! To celebrate, here is my first fall pattern of the year: the PLUM scarf!
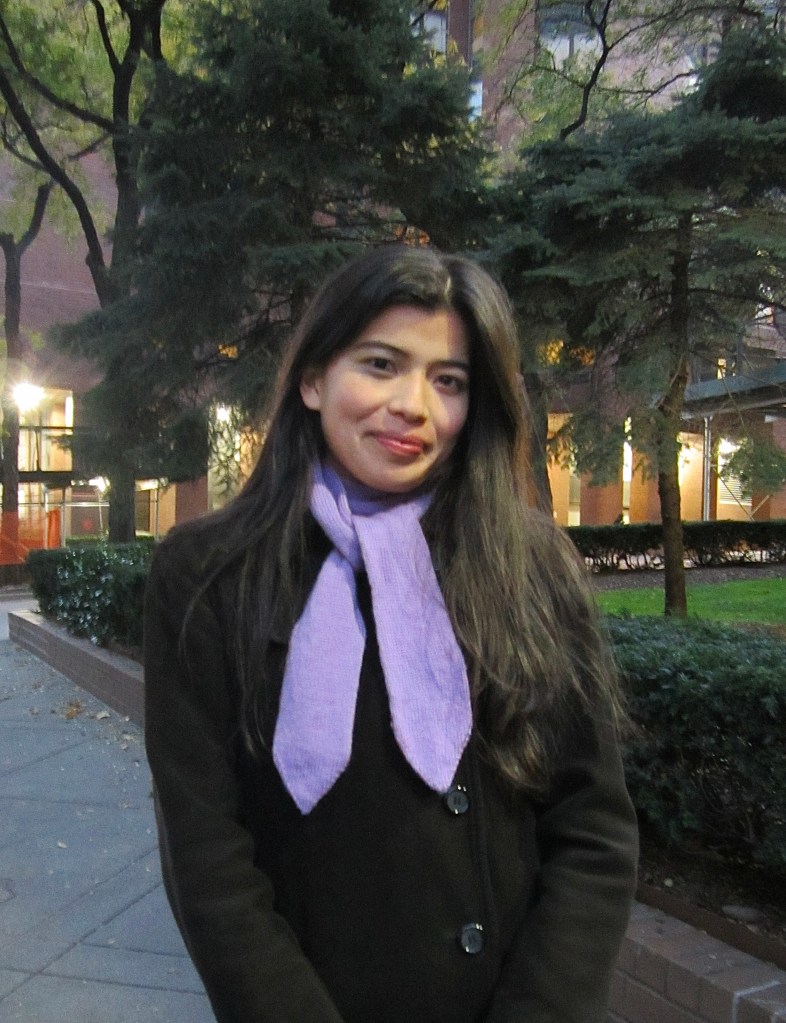
The Plum Scarf is a simple yet thoughtful design. With customizable width (and length), neatly tapered ends, and a professional double-sided stockinette look created by knitting in the round (just wait!), it is the perfect accessory to level up any fall outfit.

Not only is this the perfect accessory pattern, it is the perfect stash-busting pattern as well! The plum scarf is the project meant for that random skein of fingering weight yarn you have lying in your stash. You know the one – that vibrant, eye-catching (perhaps sparkled) skein that you bought impulsively, yet never found the right project for. This is your chance!

I knit mine up in a bright purple yarn I had lying in my scarf for ages. I didn’t have enough of the yarn to make a large project (like a sweater), but had too much to use bits and pieces for edging and trim. I cast on a few stitches, started increasing, and suddenly a scarf was born. I knit until my ball had dwindled, cast off, and created my new favorite accessory.

To create the professional-looking (and extra warm) double-layered stockinette that makes up all of this scarf, we will be working in the round using the magic loop technique. If this is your first time using the magic loop technique, don’t worry! The beginning might be a bit finicky, but as soon as there are more stitches on the needles you will get it right away. I have also included a video tutorial to make the process especially smooth!
Now, without further ado… let’s get into this pattern!
MATERIALS
- Fingering weight yarn. I recommend around 350 yards, or more. You can use a heavier weight yarn if necessary, just make sure to adjust needle size accordingly and account for the double-sided fabric — your scarf may turn out quite thick. I used Cascade Heritage yarn in the brightest purple color on their site, haha!
- 3.25mm circular knitting needles and a cord AT LEAST 32 inches/80 cm long. I use a 32 inch long cord myself. You need this length for the magic loop technique!
- Tapestry needle to weave in ends.
VIDEO TUTORIAL
I’ve published a video tutorial on some of the steps in this pattern, if you’d like to follow along! (COMING SOON!)
PATTERN
- CO 3 stitches
- Kfb, kfb, kfb
- Divide stitches so that there are 3 on each needle. We will be continuing this project with the magic loop technique. Orient to start working in round.
- Kfb, k, kfb on first needle. Kfb, k, kfb on the second needle.
- K around
- Kfb, k until last stitch on first needle, kfb. Kfb, k until last stitch on second needle, kfb.
- K around
- Repeat last two rounds (6 and 7) until scarf reaches desired width.
- K around
- Repeat last round (9) until scarf reaches desired length, minus tapered end
- Ssk, k until last two stitches on first needle, k2tog. Ssk, k until last two stitches on second needle, k2tog.
- K around
- Repeat last two rounds (11 and 12) until there are 5 stitches left on each needle (10 stitches left in total).
- Ssk, k, k2tog on first needle. Ssk, k, k2tog on second needle.
- K3tog on first needle. K3tog on second needle.
- Cut yarn and pull through last two stitches.
- Weave in ends!
Now your Plum Scarf is finished!
I will be wearing this beauty with every outfit this season. I hope you’ll enjoy it too 🙂
There are more winter patterns coming veryyyyy soon, but until then:
Happy Knitting!

Leave a comment