

Hey there… long time no see! I’ve been pretty MIA on this website for the last few months – but no longer! From now on we’ll be back to regular schedule, which means more free crochet and knitting pattern releases!
The pattern included in this post is actually one that I’ve been making for years, ever since I got my first AirPods (I got the first generation as a birthday gift many years ago, and they’ve served me ever since!). I wanted to protect my AirPods case, but I didn’t want to purchase a silicone cover that I knew would be overpriced and collect dust after only a few wears. So – I decided to crochet one!
This case cover is super practical, with a hole at the bottom so you can charge your case without taking it out of its cover. To showcase how simple it is to use, I’ve included a video below. It’s also super cute! I am on a mission to create one in every color.
This AirPods Case Cover is the QUICKEST crochet project you’ll have made in a hot sec, and it has SO MANY customizable options. I’ve made five of these already and I plan on making more! They make the perfect gifts for family and friends and are also a great palette cleanser for in between larger projects.
This pattern has sizing notes throughout, so although it’s designed specifically for an Apple AirPods case, it should be easy to adjust in order to fit other cases!
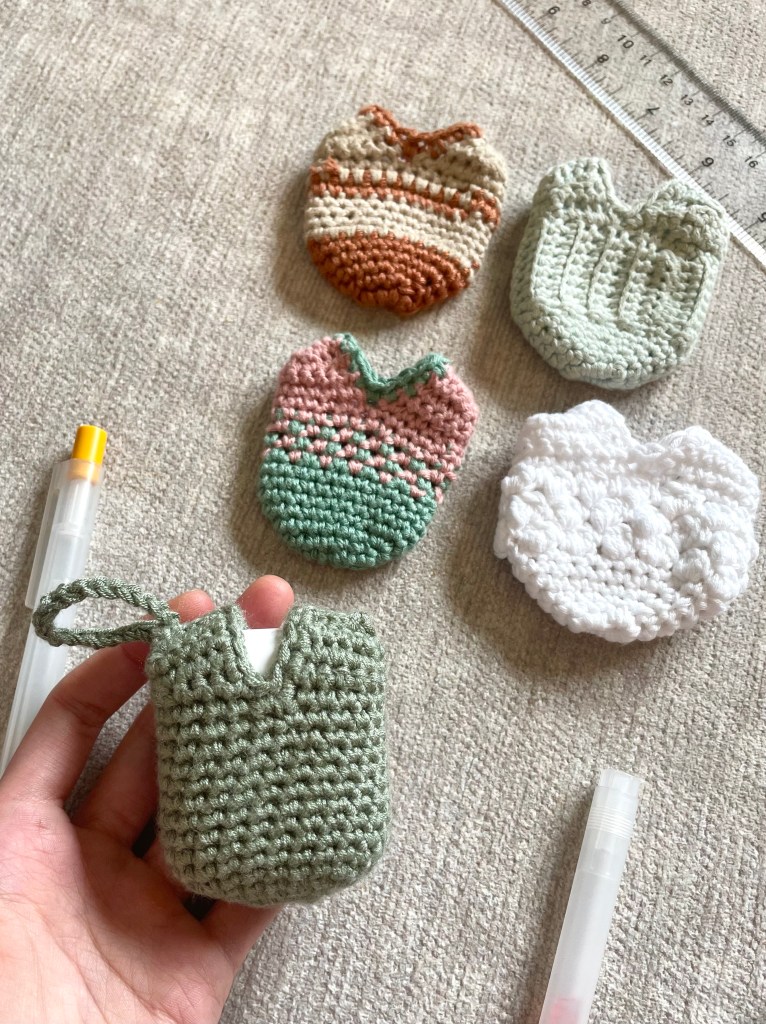
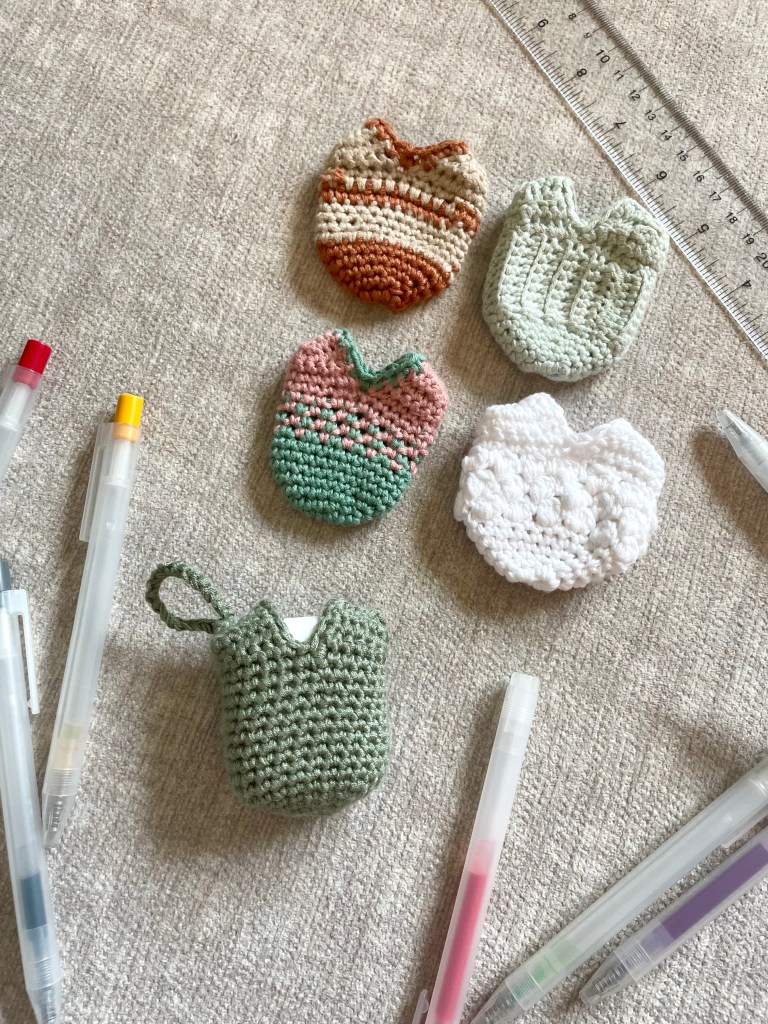
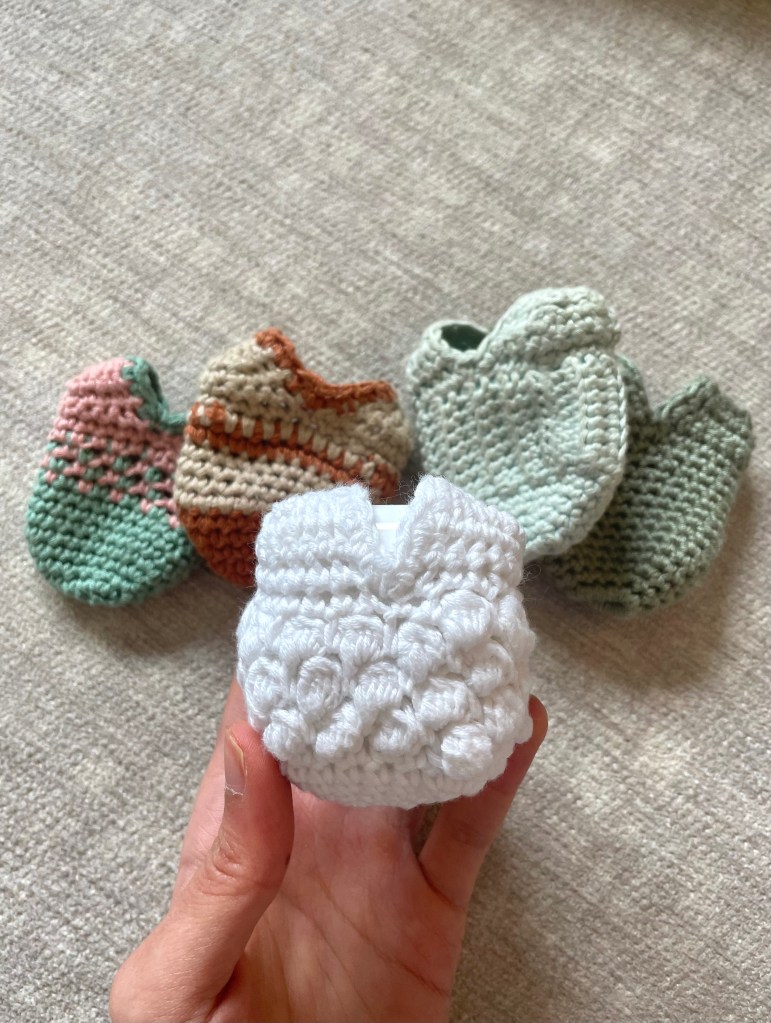
Here are all the versions I’ve made so far:
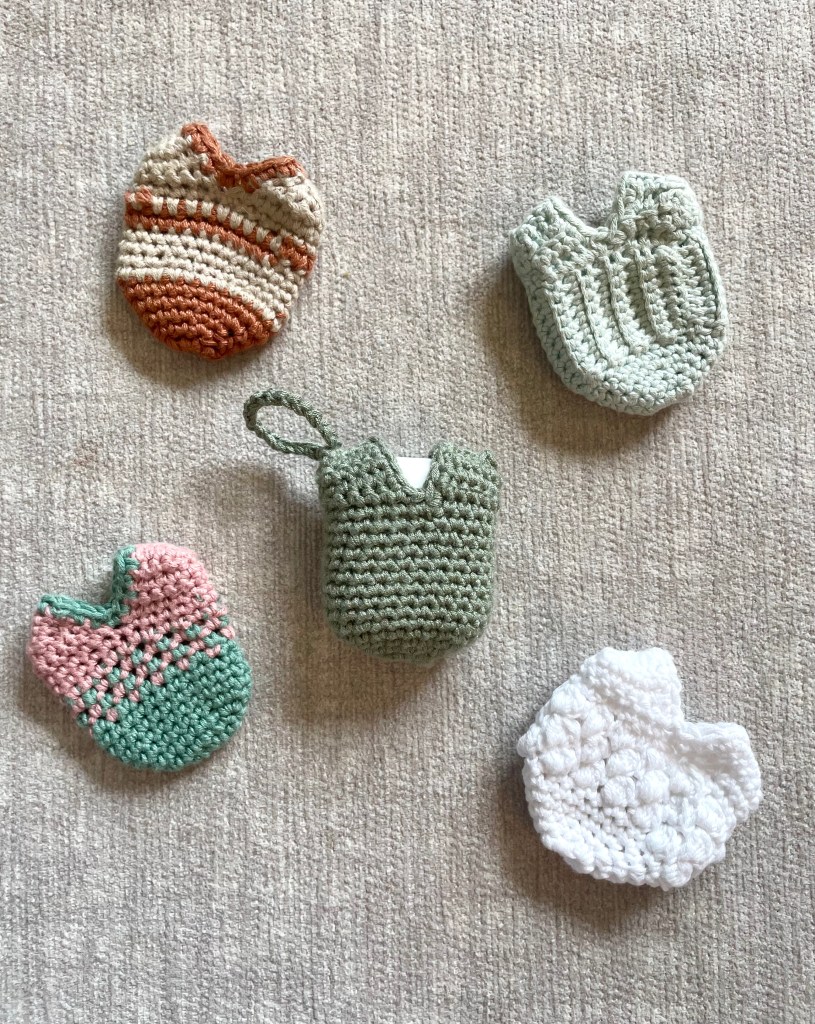
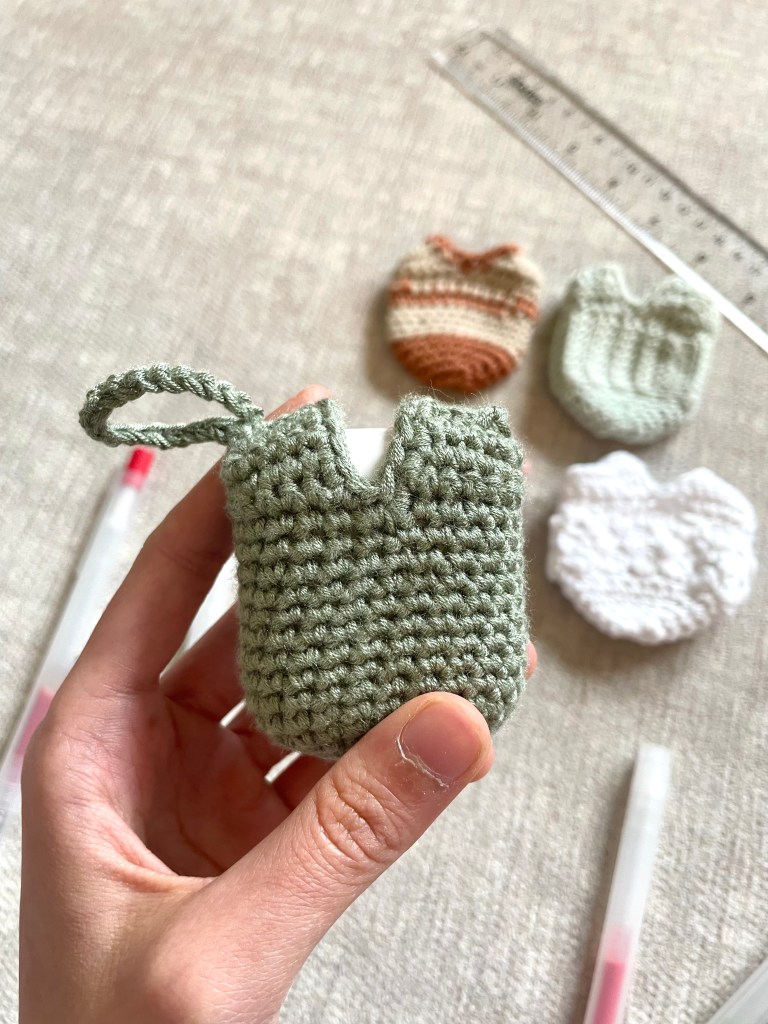
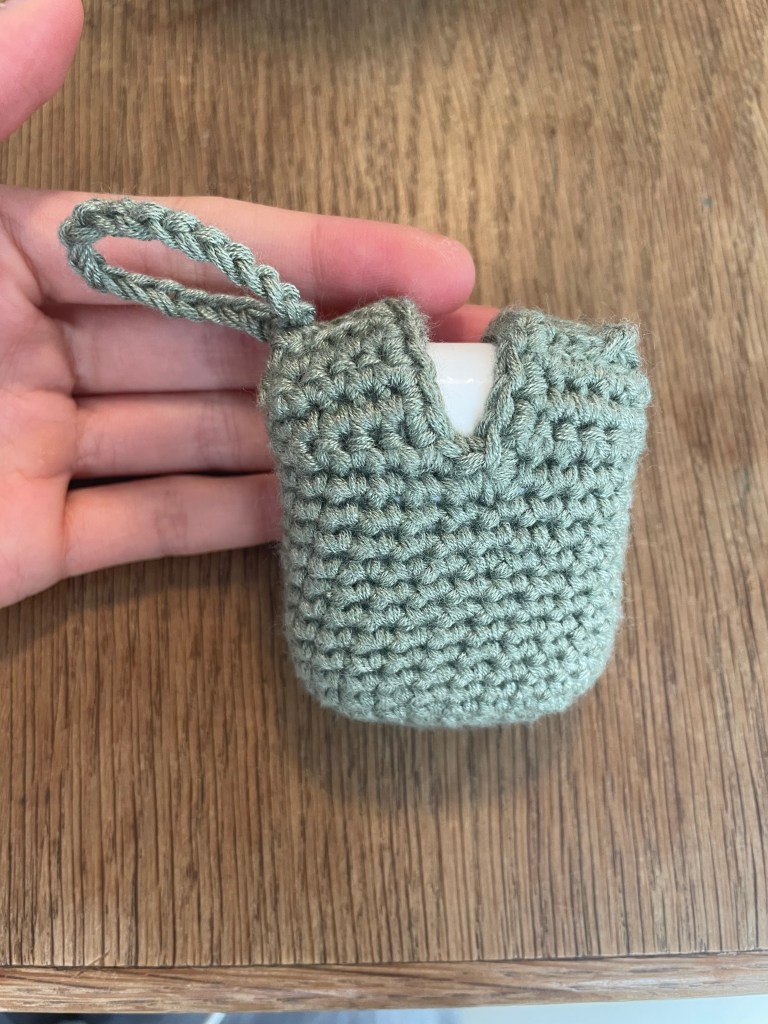
The metallic green one in first is the final iteration of the pattern, and basically the version you’ll get if you follow the pattern directions below. It’s the perfect basic case, made with the simplest of crochet skills. I even added a strap to the top so you can attach your AirPods to a keychain or bag for easy access!
The next few versions are spiced up with striping, ribbing, colorwork, and bobbles. This is the perfect project to showcase your creativity — and have fun experimenting with different stitches without committing to a larger project!
So, without further ado, let’s get into the details.
MATERIALS
2.75 mm crochet hook
Fingering weight yarn (I used cotton yarn, but any will do!)
Tapestry needle
LEVEL
Beginner
ABBREVIATIONS/STITCHES USED
Sc: single crochet
Inc: increase (two single crochets in one stitch)
Dec: decrease (sc2tog)
Ch: chain
Sl st: slip stitch
St: stitch
PATTERN
This pattern is divided into three parts: bottom, body, top, and edge. There are photos (labelled) at the end that correspond to critical steps.
Bottom
- Ch 6, sl st in first ch to create a loop
- Ch 1, sc 11 in loop, sl st to first ch 1 (you should have 12 stitches around)
- Inc in next st, sc 3, inc, sc 1, inc, sc 3, inc, sc 1
- Inc in next st, sc 5, inc, sc 1, inc, sc 5, inc, sc 1
- Inc in next st, sc 7, inc, sc 1, inc, sc 7, inc, sc 1.
NOTE: try the cover on over the bottom of your case. It should fit (remember to STRETCH) but if it seems too small you can repeat an increase round (same as round 5, but with sc 9 instead of sc 7). - * Sc 24 around *
- Repeat * – * 2 more times.
Now you have finished the BOTTOM portion of the cover. See PHOTO A for a better description of what this means.
Body
You will now move onto crocheting the BODY of the cover, which has a lot more creative options! If you follow through the pattern, you will just create a single crochet body, but feel free to experiment with colorwork/bobbles/stitchwork here.
- Sc around until body reaches necessary length. Stop round at the center back of AirPods case. (PHOTO B)
Top
- Ch 1, turn, sc 12
- Ch 1, turn, sc 12
- Ch 1, turn, sc 4, dec 2, sc 4
- Ch 1, sc 4, dec
Now, sew the edges together with a tapestry needle. Alternatively, you can sl st the edges together with your working yarn. Fasten off yarn. (PHOTOS C)
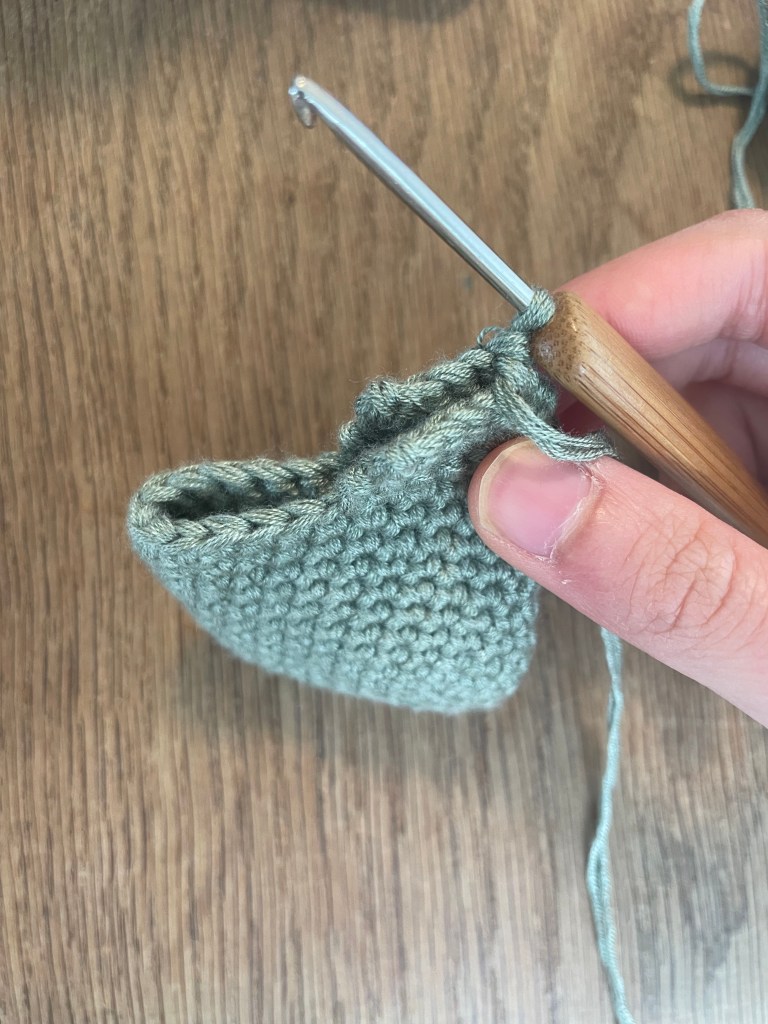
- Attach yarn to front center. To do this, insert hook in the stitch before (which already has been crocheted), pull up a loop of yarn, and ch 1. (PHOTOS D)
- Sc 12
- Ch 1, turn, sc 12
- Ch 1, turn, sc 12
- Ch 1, turn, sc 4, dec 2, sc 4
- Ch 1, sc 4, dec
Now, sew the edges together with a tapestry needle. Alternatively, you can sl st the edges together with your working yarn (PHOTOS C). I recommend NOT cutting working yarn, as you will use it to work the edging.
Edging
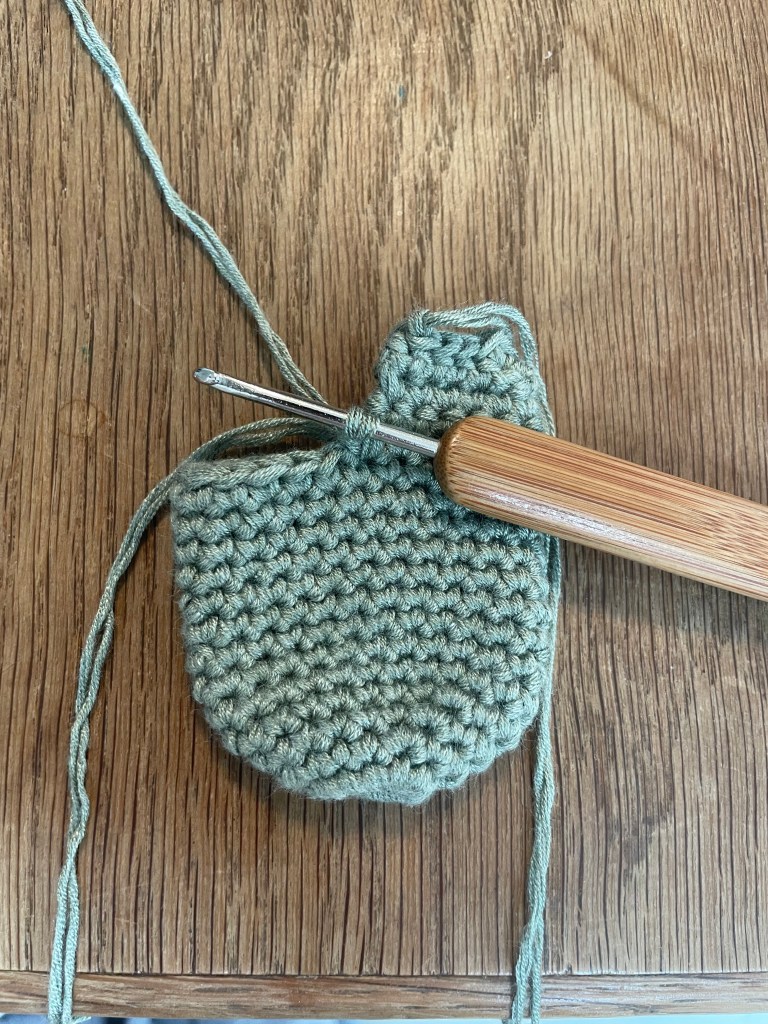
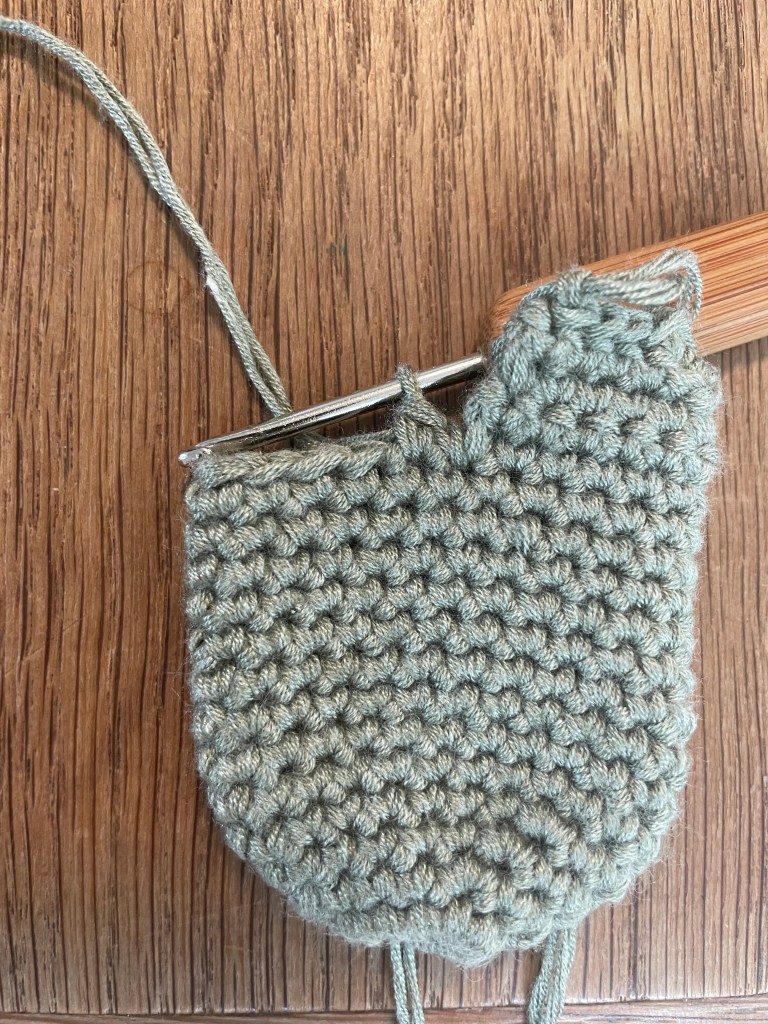
For the edging, you will be working around the top opening (PHOTOS E).
- Ch 1, sc around opening
- Fasten off yarn.
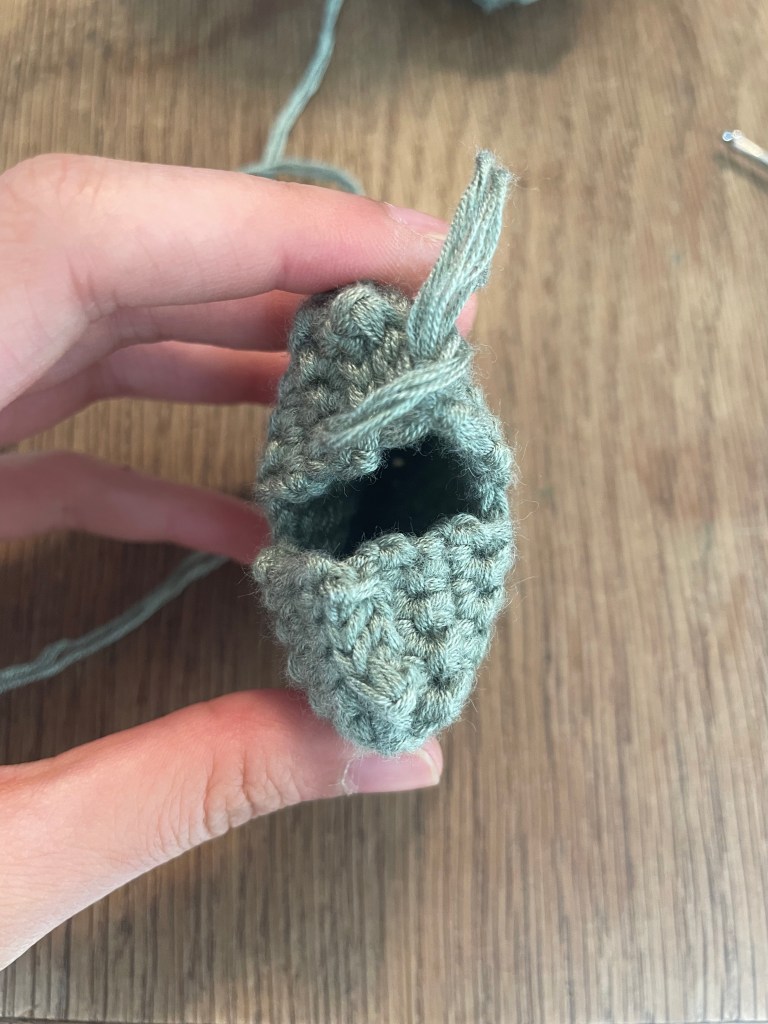
- OPTIONAL: Now, we will make a strap. Insert a hook in the top corner, pull up a loop, and begin to chain. Ch however long you want your strap to be (I did around 20 chains). Then, sl st back to the original corner (starting point) and fasten off, creating a loop. (PHOTOS F)
Now your AirPods Case Cover is finished! You’ll find photos below, if you want clarification on any of the steps above 🙂
Photos
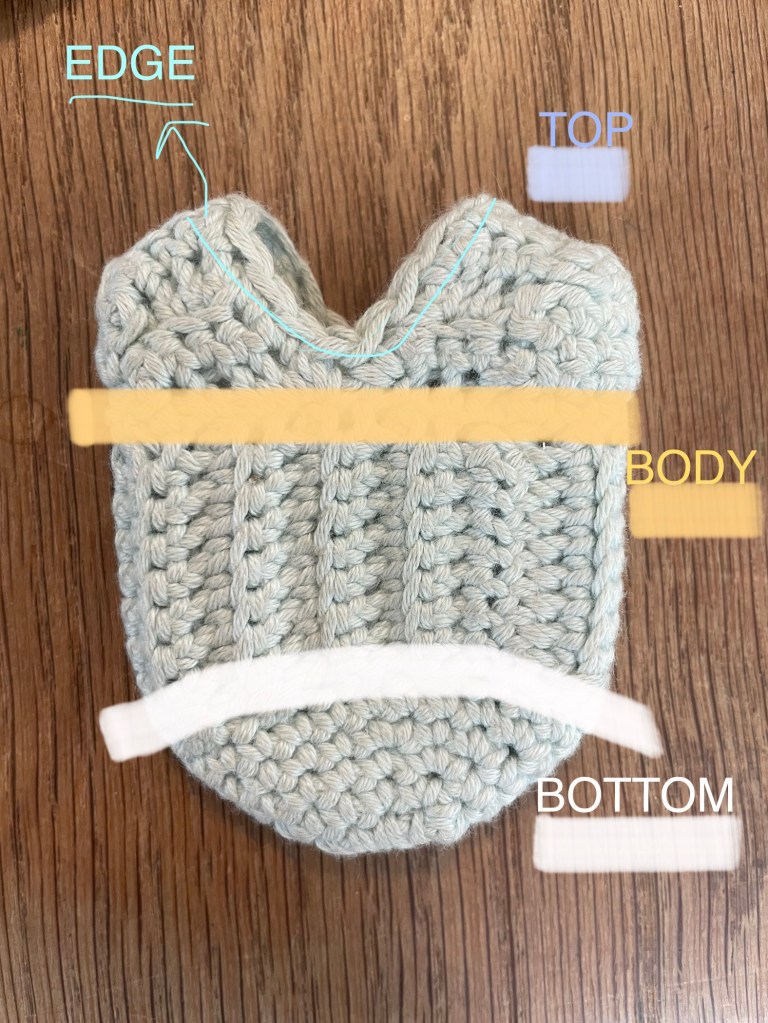
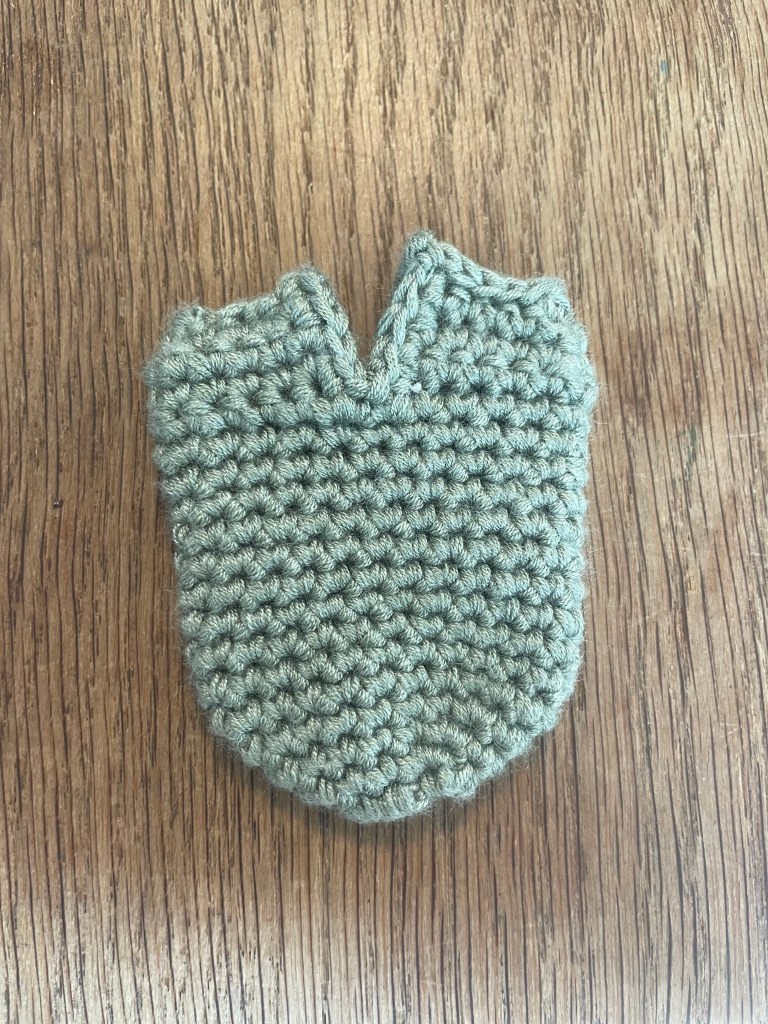
PHOTO A: Here you can see the divisions between bottom, body, top, and edge.
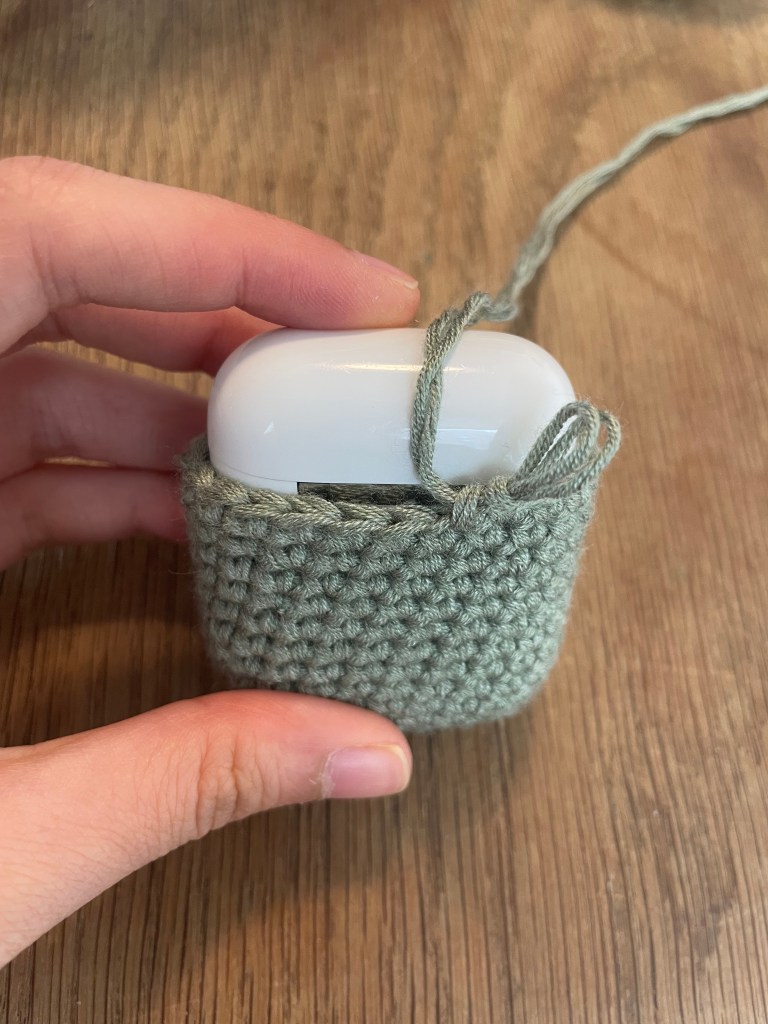
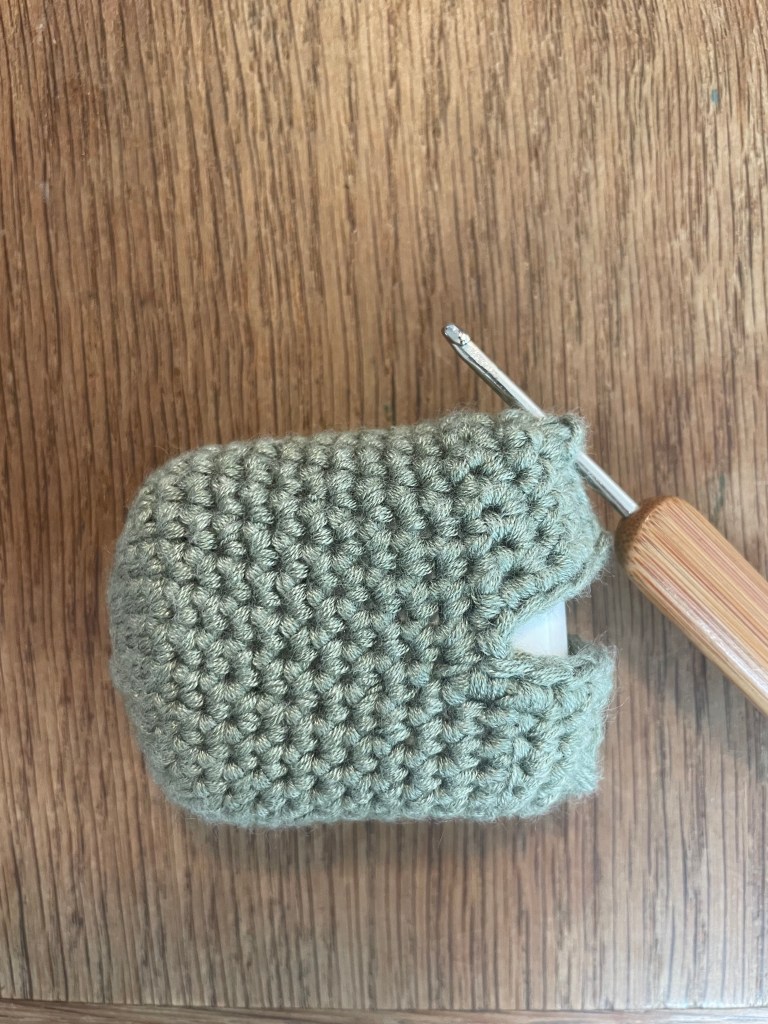
PHOTO B: Here you can see where your body should end (before the cap of the AirPods case). You can also see how your last body row should end in the middle center back.
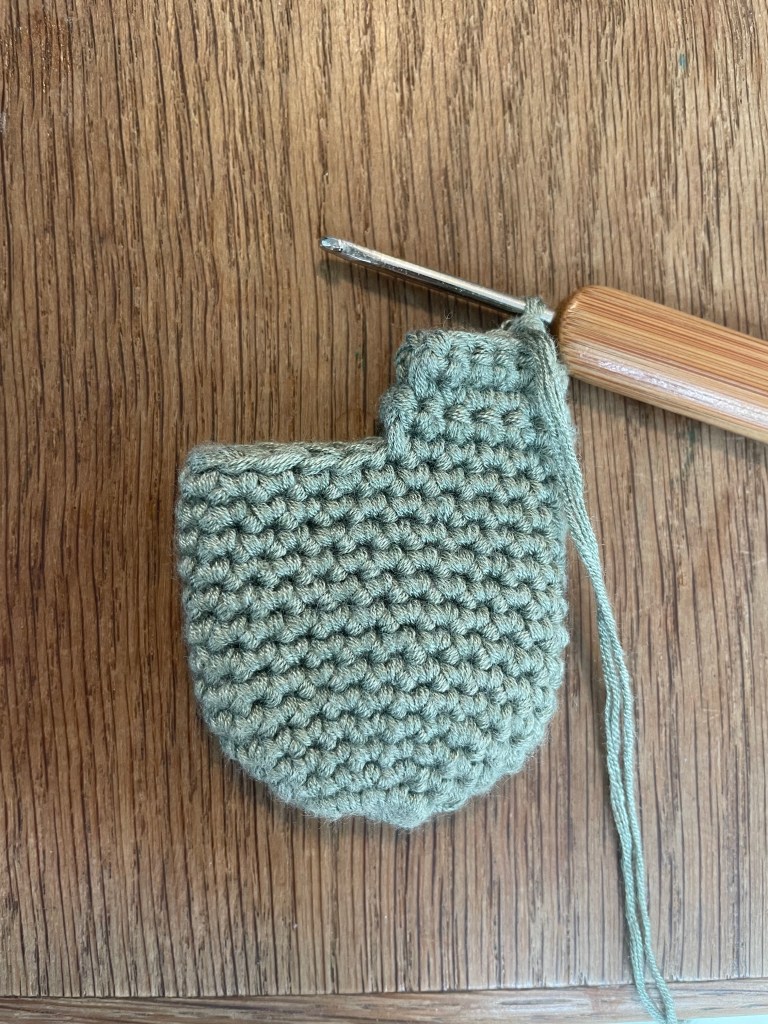
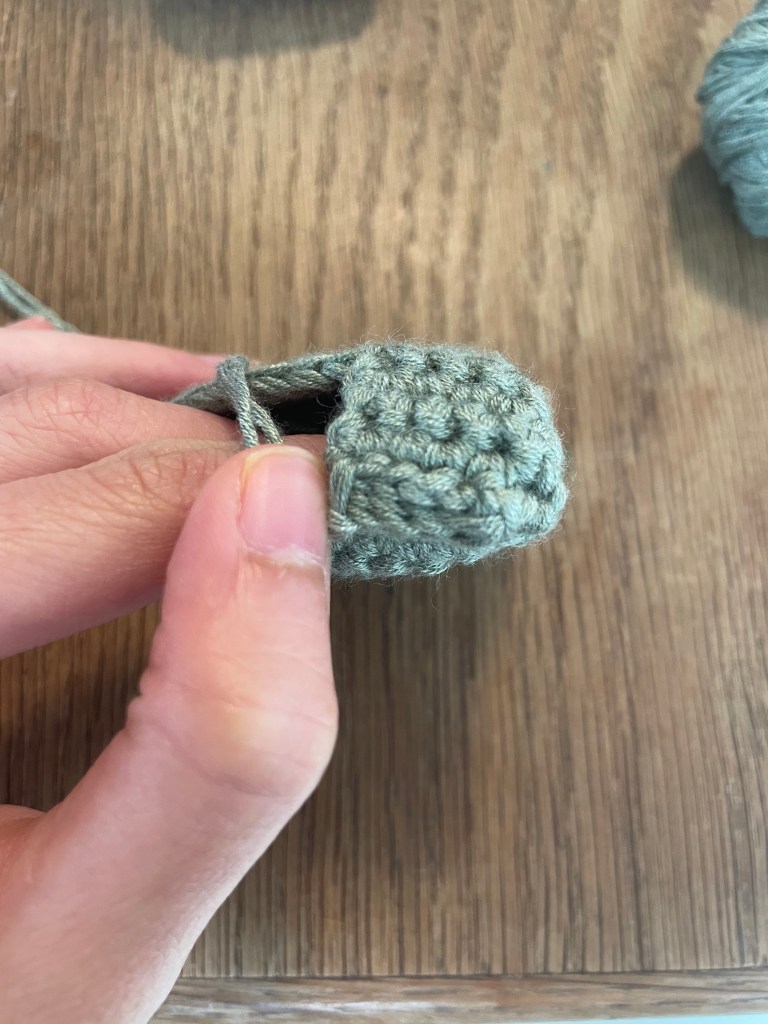
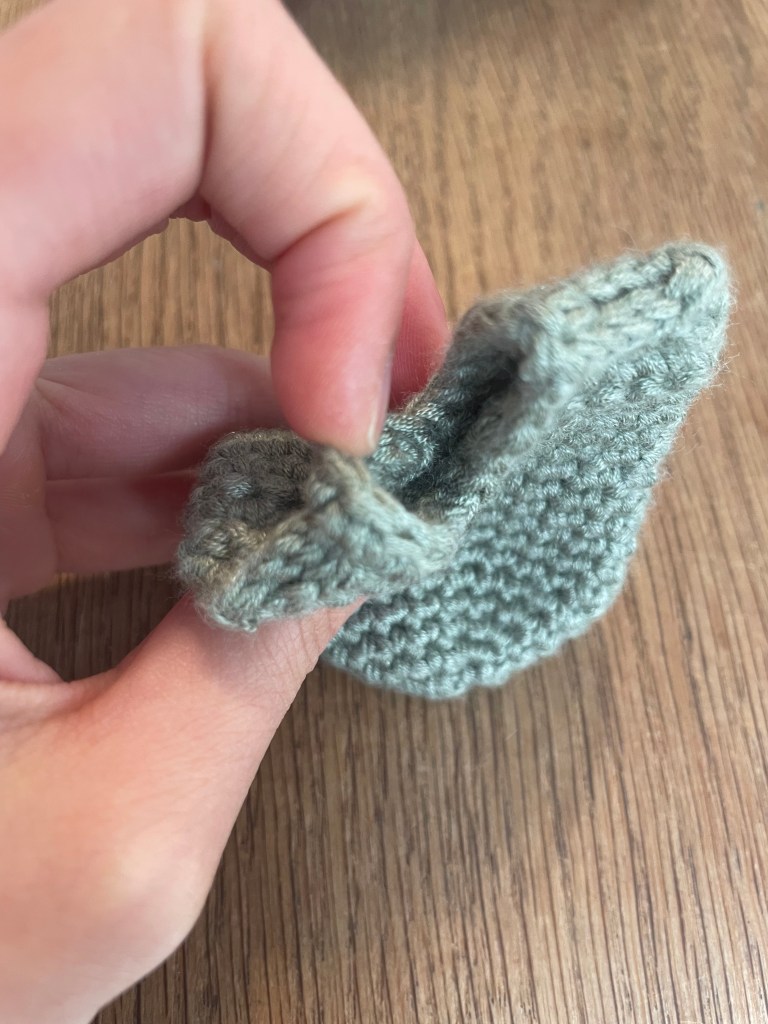
PHOTOS C: Here you can see the edges that must be sewn (or sl sted) together.
PHOTOS D: The first photo shows the first step of connecting the yarn to the center front (insert hook in stitch before first open stitch, pull up loop of yarn, ch 1). The second photo shows the first counted stitch (the first of the sc 12).
PHOTOS E: The first photo shows where you will crochet your edging around. The second two photos show the result.
PHOTOS F: Making the optional loop.
And that’s it for this pattern! I have a lot of fun summer patterns up my sleeve, so watch this page in the coming weeks for some more free crochet (and knit!) inspiration. I’m so happy to be back 🙂
Happy Crocheting!

Leave a comment