

December is finally here, and we all know what that means… holiday season!
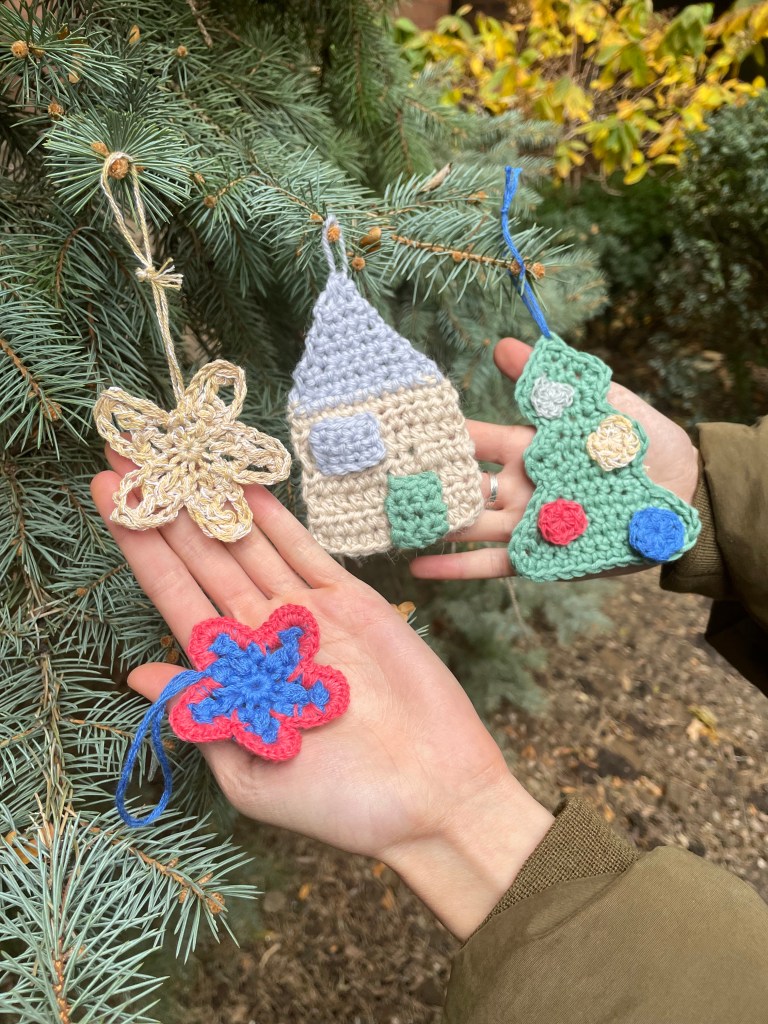
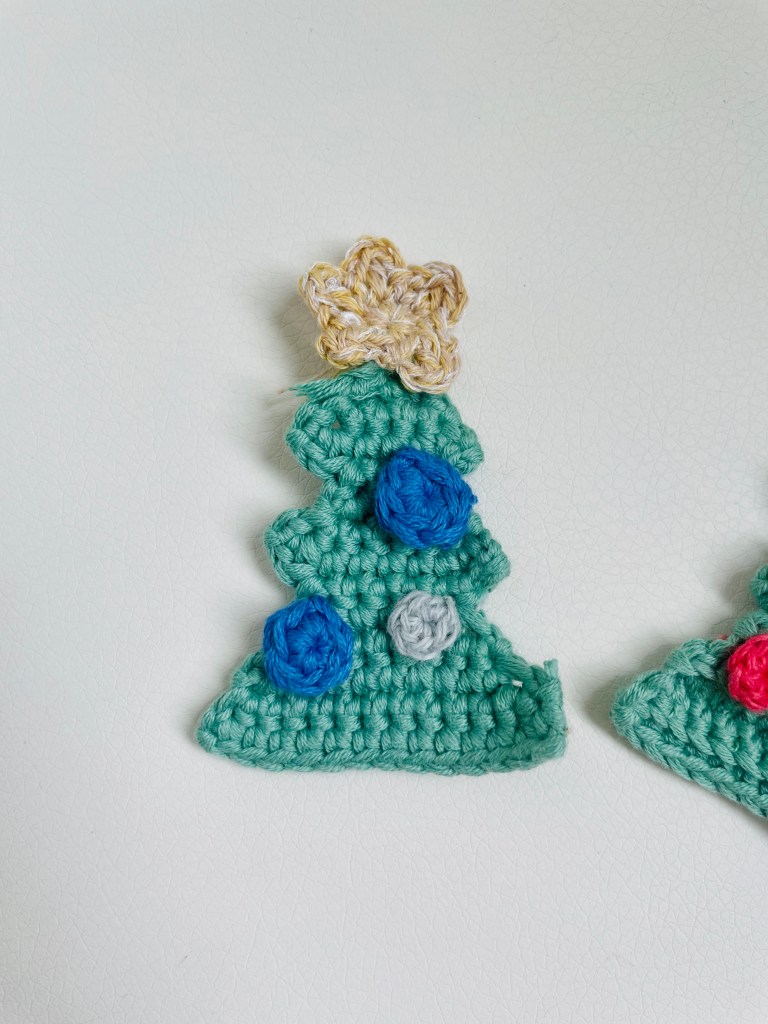
Image above: house, tree, and star patterns
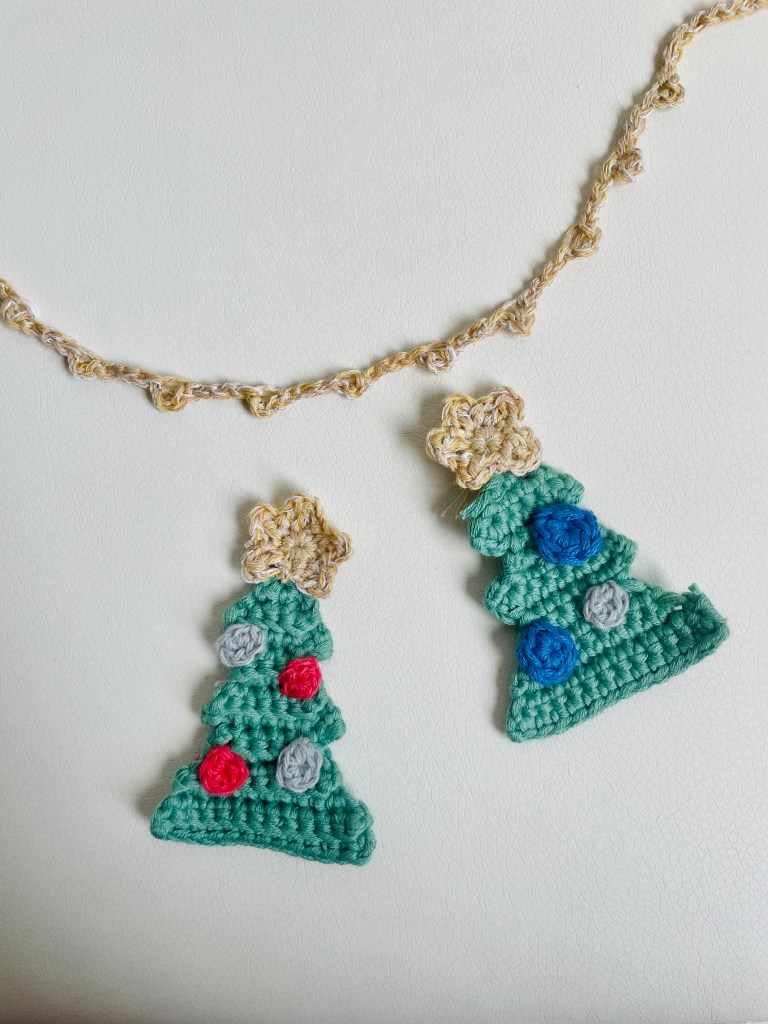
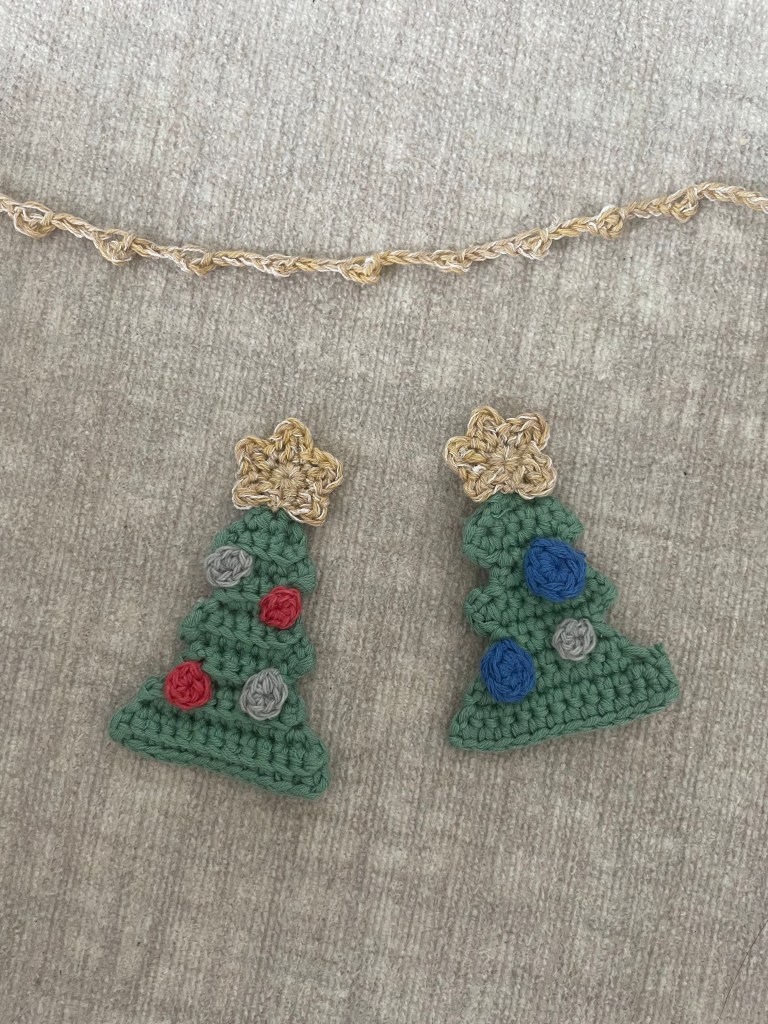
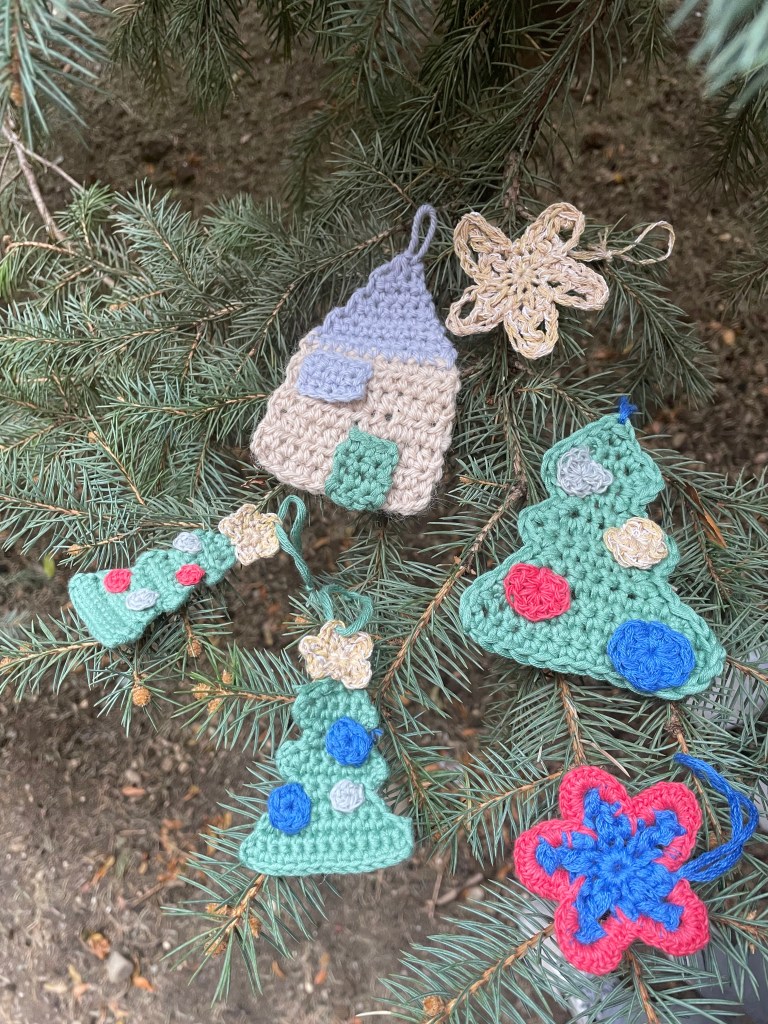
Image below: tree, star, and string of lights patterns
December is one of my all-time favorite months of the year because it means delicious food, cozy pajamas, and pine trees lined up along the block.
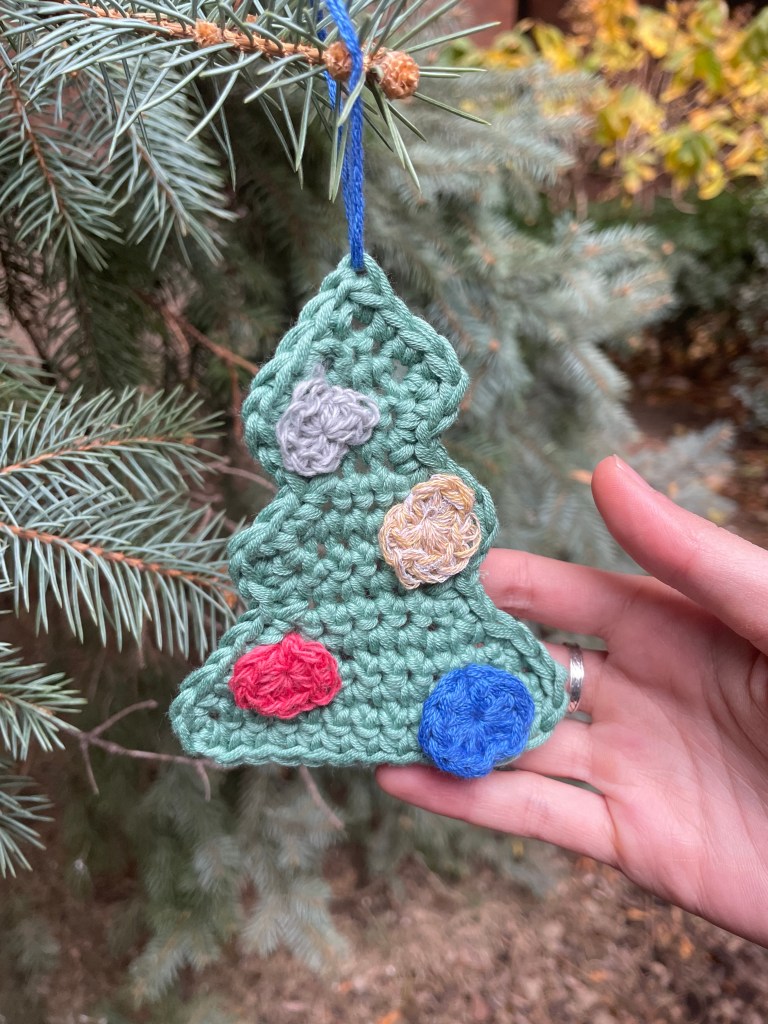
My family gets a Christmas tree almost every year, but this time I decided to elevate ours a little bit with some handmade Tree Ornaments! I can’t wait to start decorating 🙂
There are multiple pattern designs available on this page: a Christmas tree, balls for the tree, a star for the tree, a house, and an adorable string of lights to be strung anywhere around your house! All of the patterns are available for free below 🙂
The Christmas Tree
This pattern is super simple and can be made with any yarn and any hook size, depending on what you have on hand. I used a fingering weight cotton yarn and a 2.5 mm hook, but truly anything will work.
Pattern:
- Chain 3
- Chain 1 for turning, sc across (3)
- Ch 1, sc 2 in first stitch, sc until last stitch, sc 2 in last stitch (5)
- Ch 1, sc 2 in first stitch, sc until last stitch, sc 2 in last stitch (7)
- Turn, slip stitch in first stitch (current stitch), slip stitch in next stitch
- Ch 1, sc until last 2 stitches (3)
- Ch 1, sc 2 in first stitch, sc until last stitch (NOT CHAIN 1), sc 2 in last stitch (5)
- Ch 1, sc 2 in first stitch, sc until last stitch, sc 2 in last stitch (7)
- Ch 1, sc 2 in first stitch, sc until last stitch, sc 2 in last stitch (9)
- Turn, slip stitch in first stitch (current stitch), slip stitch in next stitch
- Ch 1, sc until last 2 stitches (5)
- Ch 1, sc 2 in first stitch, sc until last stitch (NOT CHAIN 1), sc 2 in last stitch (7)
- Ch 1, sc 2 in first stitch, sc until last stitch, sc 2 in last stitch (9)
- Ch 1, sc 2 in first stitch, sc until last stitch, sc 2 in last stitch (11)
- Ch 1, sc 2 in first stitch, sc until last stitch, sc 2 in last stitch (13)
- Ch 1, sc across (13)
- Fasten off, weave in ends
Option 2: follow the same pattern above, but sc in BLO (version 1 is shown in picture above, version 2 is shown in picture below)
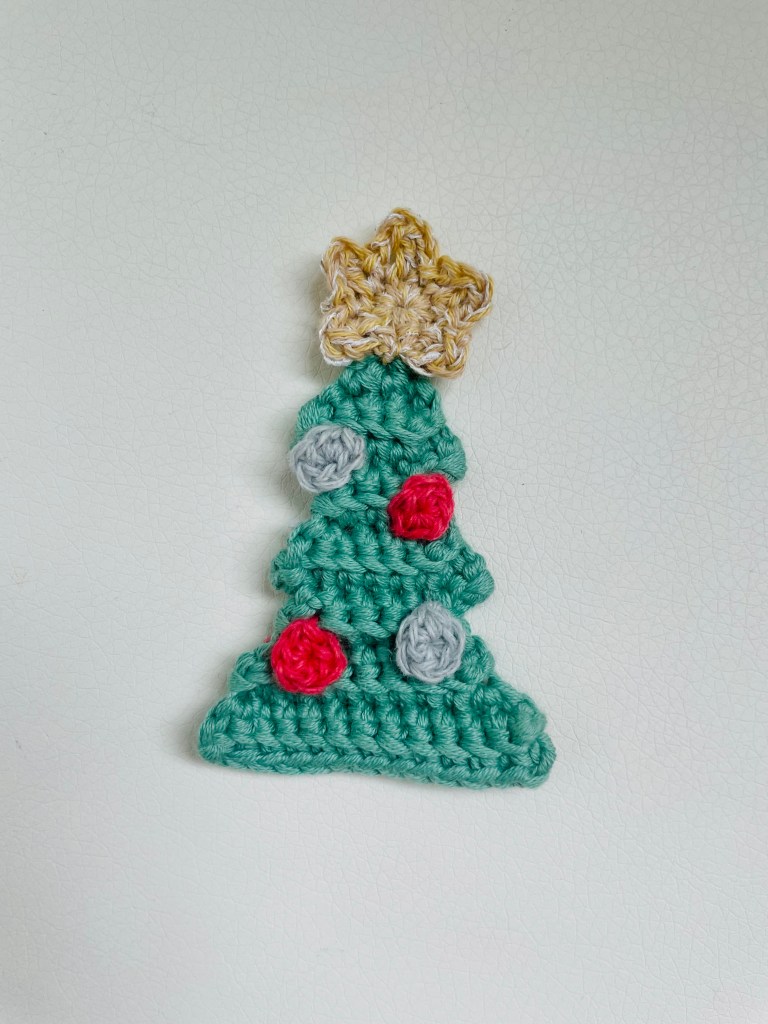
Another note about the tree: For the larger version (pictured below), I simply used a larger hook (5.0 mm) and single crocheted around the edges of the piece after I was finished.
The Balls
For this pattern I used scraps of lace weight yarn and the same 2.5 mm hook. These balls use almost no yarn!
Pattern:
- Magic loop
- 6 sc in loop, slip stitch to close
The Star
For this pattern I used a scrap of yellow fingering weight yarn and a 2.5 mm hook.
Pattern:
- Magic loop
- 10 sc in loop, slip stitch to close
- Ch 2, dc in same stitch, ch 2, sl st in next stitch.
- Ch 2, dc in next stitch, ch 2, sl st in next stitch. Repeat until you reach the first stitch. There should be 5 points.

Note: For the large star (pictured above), after following the regular star pattern I crocheted around the edge of the star, adding chains and treble crochets at each point for accentuation. For the stars on the trees I did not make this modification.
The String of Lights
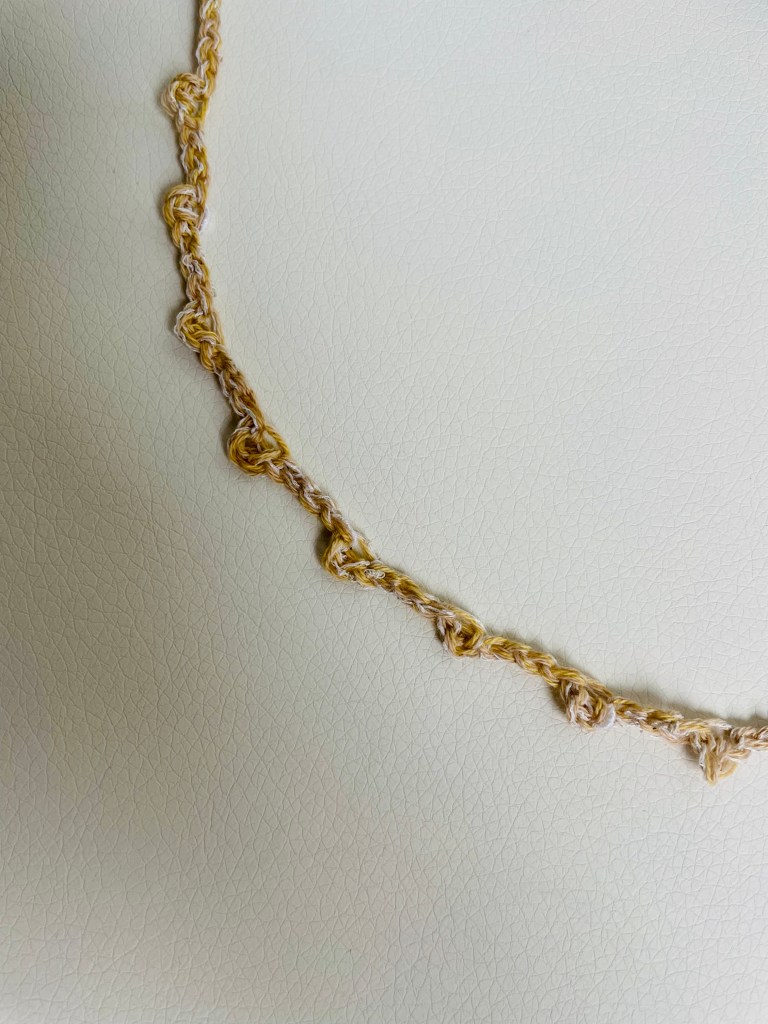
For this pattern I used the same yellow fingering weight yarn as used for the Star and the same 2.5 mm hook as well!
Pattern:
- Ch 10 or as long as desired (starting chain for hanging)
- Then start bulbs:
- Ch 3. Sl st to first ch of ch 3.
- *Ch 3.
- Ch 3. Sl st to first ch of ch 3.*
- Repeat * – * until reaches desired length
- Ch 10 or as long as desired (ending chain for hanging)
Optional: Sewing the parts together
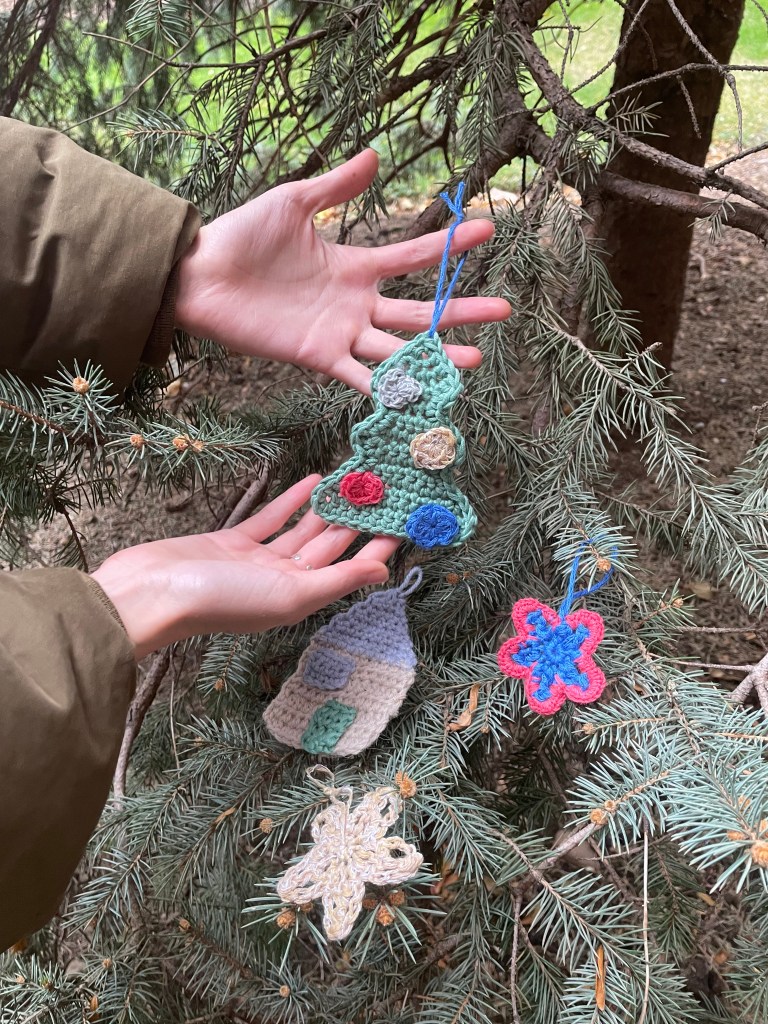
If you would like your ornaments to look like mine, simply sew the balls and star on top of your crochet tree in whatever placement you’d like. I would also recommend attaching loops of string so that you can hang your ornaments from the branches of your real Christmas tree!
The House
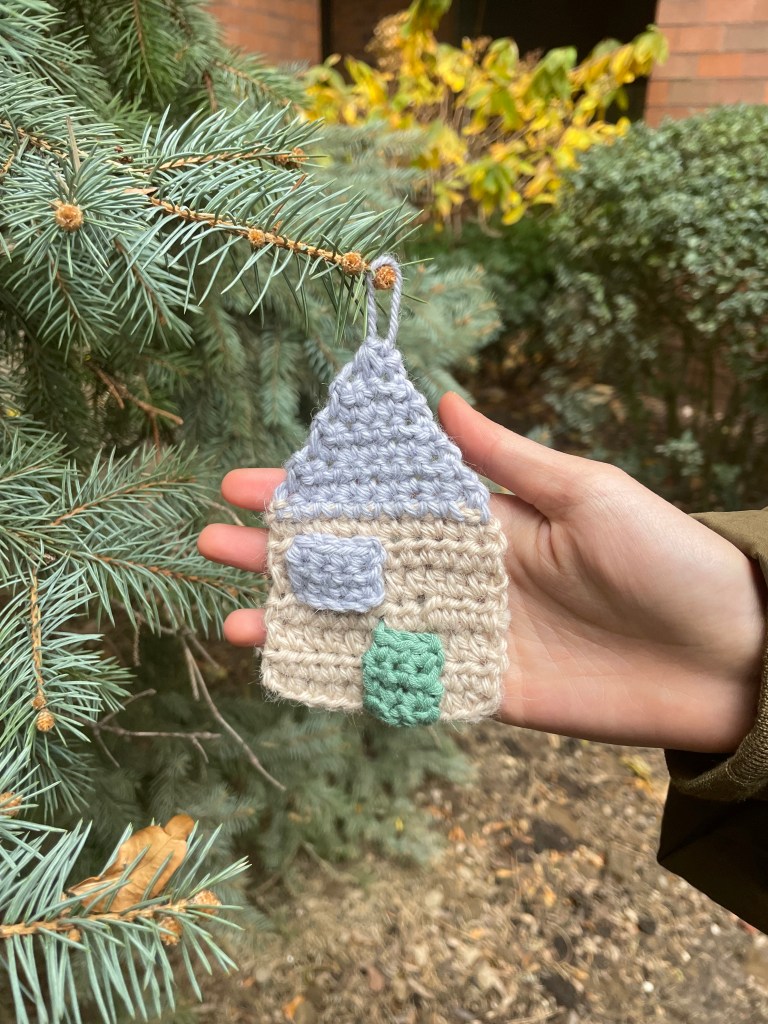
For this pattern I used some DK weight scrap yarn I had lying around the house and a 5.0 mm hook.
- Ch 11 in color A (or chain as many as you want your house to be wide)
- Hdc across
- Ch1 for turning, hdc across
- Repeat row 3, 3 more times (or until house reaches desired height)
- Ch1 for turning, sc across
- Change to color B
- Ch1 for turning, sc2tog, sc to last 2 st, sc2tog
- Ch1 for turning, sc across
- Ch1 for turning, sc2tog, sc to last 2 st, sc2tog
- Repeat steps 8 and 9 until there are 3 st left
- Ch1 for turning, sc3tog
- Fasten off, leaving a long tail to make a loop (for hanging)
Add windows:
- Ch4 (or as wide as you want the window to be)
- Ch1 for turning, sc across
- Repeat row 2 until window reaches desired height (I did around 3 rows)
- Fasten off, leaving long tail to sew onto house
Add door:
- Ch3 (or as wide as you want the door to be)
- Ch1 for turning, sc across
- Repeat row 2 until door reaches desired height (I did around 4 rows)
- Fasten off, leaving long tail to sew onto house
That’s it for this blog post! I hope you enjoyed these patterns. I can’t wait to hang up my handmade ornaments this year and add more to the collection soon 🙂

Leave a comment