
These earmuff warmers are colorful and retro! They’re super easy, too. Add some style to your traditional earmuffs with this beginner free pattern. They’re sure to be a hit!
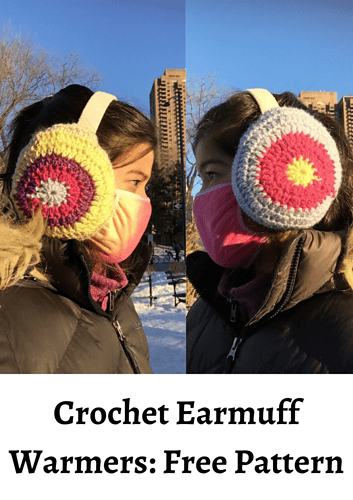
I made my earmuffs mismatched to go for the retro style, but you can make matching ones if so desired. It’s all in the color choice!
I love earmuffs because they warm the part of my face that is always cold- my ears! This pattern makes wearing earmuffs even more fun. I made a few of these earmuff covers and swap them out whenever I feel like something different. They slide right on and off, making for easy changes.
I forgot to mention that this pattern, along with being super easy, is also super quick and uses less than one skein of yarn for both covers! You can probably get a few sets of these out before your yarn runs out.
And, if you’re not a fan of the color changes, make them in a solid color! I think the different colors make it fun and playful, but they’d also look nice all in one color. Imagine having a whole rainbow set!
The theme for this earmuff cover set was the sunset. Welcome, Sunset Earmuff Warmers! Other color sets that I think would look stunning are:
- Oceanic Earmuff Warmers (aqua, blue, sky, mint, green, etc.)
- Sunrise Earmuff Warmers (red, orange, yellow, gold, pink, etc.)
- Evergreen Forest Earmuff Warmers (dark green, brown, black, light green, etc.)
- Floral Earmuff Warmers (dark green, pink, purple, yellow, white, etc.)
- Monochrome Earmuff Warmers (white, gray, black, shale, etc.)
Those are just some ideas! Play around the color scheme until you come up with something you love, and then start hooking!
All you need is…
-Yarn
I used scrap yarn for this project (sorry I don’t have a brand). I would recommend any type of yarn, in all the colors you can think of! Fun combos are the best combos 🙂
As for hook size, pick something around a size 5.
Stitches used:
Magic ring (search it up on youtube and look at the tutorials. There are hundreds! That’s how I learned 😉
Double crochet (dc): yarn over, insert hook into stitch, yarn over, pull through stitch, yarn over, pull through 2 loops on hook, yarn over, pull through remaining two loops. Remember, youtube is a great resource to utilize!
Double crochet two stitches together (dc2tog): yarn over, insert hook into stitch, yarn over, pull through stitch, yarn over, insert hook into NEXT stitch, yarn over, pull through stitch, yarn over, pull through all loops on hook. This is probably the hardest stitch used in this pattern.
Slip stitch (sl st): insert hook into stitch, yarn over, pull through all loops on hook.
Ready for the free pattern? I sure am!
- Make a magic ring.
- Ch 3.
- 11 dc into magic ring.
- Sl st to join.
- Optional: change colors now
- Ch 3.
- 2dc in every ch/hk.
- Sl st to join.
- Optional: change colors now
- Ch 3.
- *Dc into next st.
- 2 dc into next st.*
- Repeat * – * (steps 9-10) until end of round.
- Sl st to join.
- Optional: change colors now
- Ch 3
- ~Dc into next 2 chains.
- 2 dc into next st.~
- Repeat ~ – ~ (steps 14 – 15) until end of round.
- Sl st to join.
- Optional: change colors now
- Ch 3
- !Dc into next 3 chains
- 2 dc into next st!
- Repeat ! – ! (steps 23 – 24) until end of round.
- Sl st to join.
- Repeat pattern of increases until the circle is the size of your earmuff. I reached accurate size at this point, but you may have to work more/less depending on how big your earmuff is.
- Ch 3
- Dc in every chain from hook
- Sl st to join
- Ch 3
- Dc in every chain from hook
- Sl st to join
- Ch 3
- +Dc in next 4 stitches
- Dc2tog in next+
- Repeat + – + (steps 35 – 36) until end of round
- Sl st to join
- Ch 3
- Dc in next 5 stitches
- =Ch 3, turn
- Dc across 5 stitches=
- Repeat = – = until your strip of crochet reaches across the open side of the earmuff cover- you don’t want it to be loose, but not tight either. This may take 4-6 rows. For me, it took 5.
- Fold the strip of crochet so that it covers the open side of the earmuff cover and slip stitch the unattached end to the opposite side. (Watch the video attached for more details if this doesn’t make sense)
Now, repeat that whole thing over again for your second earmuff cover. Use the same color scheme or mix it up like I did!
In case you were having trouble, the earmuff covers slip on the earmuffs. You can pull the strap over and then shift them so that they cover the earmuff pads. You should have the strap on the inside of the earmuff.
Once both covers are on, you’re done! Hooray!
I hope you enjoyed this pattern 🙂 I had a lot of fun designing it and then wearing my retro earmuff covers!

Happy Crocheting!

Leave a comment