

This 1 hour winter hat is quick, easy, and fun to make! It only takes 1 hour and it’s ridiculously easy. To make this hat, you only need to know how to make a magic loop in crochet, double crochet, and single crochet in back loops. You can find tutorials on how to do all of those stitches right on this blog!
Since yarn is stretchy, I found that without altering the number of stitches, this hat could fit both children and adults, a huge plus if you want to mass-create holiday gifts! These hats take 1 hour at max, perfect for last minute stocking stuffers.
1 Hour Easy Hat: Story
I had less than a ball of yarn left- I had previously used it to make a headband, which doesn’t take much yarn. What was left: with a big ball of rose-pink yarn, and I didn’t know what to do with it! I needed a simple, quick, beginner pattern that anyone could use to scrape up some of that old yarn.
So, the 1 Hour Easy Pretty Winter Hat (Free Pattern) was born! You can check it out here:
This hat was great for my daily excursions- grocery shopping, walks, and everything else! It was suprisingly warm and looked great- I got lots of compliments on it from family and friends.
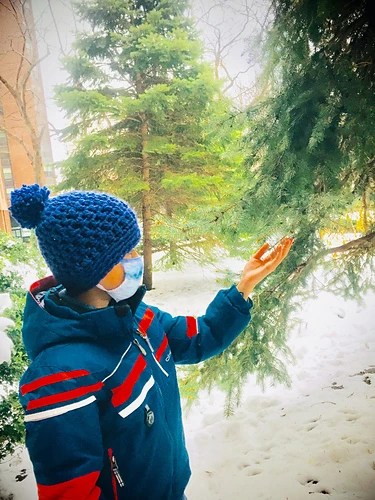
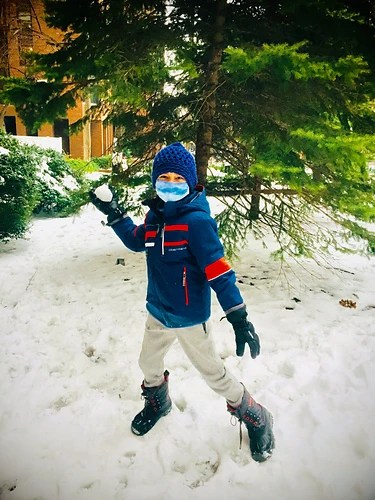
My brother liked it so much he asked for one himself! I altered the pattern a little bit for him and used a different color of yarn, and ta-da, the 1 Hour Easy Winter Hat: Free Pattern was born.
So, let’s get started!
Grab your yarn, crochet hook, and a cup of tea. I used Bernat Softee chunky yarn for this particular hat. Recommendation: use chunky yarn because it really quickens the crochet process. I haven’t actually tried this pattern with thinner yarn, so feel free to experiment, but I definitely think that this hat should be made with thick, soft yarn.
As for crochet hooks, I used a size ten bamboo hook- I bought a set of different sized crochet hooks and I switch them out depending on which project I’m working on. And, since this hat calls for chunky yarn, I used my biggest hook.
Materials for 1 Hour Easy Hat:
Yarn Used: Bernat Softee (Color Denim), only one skein needed
Crochet Hook Size: 10
Stitches Used: Magic loop, double crochet (dc), single crochet in back loops only (sc in BLO)
Timing: About 1 hour, max
Level: Beginner
Now let’s show the free pattern for this 1 Hour Easy Winter Hat. I made two versions for beginner and more intermediate-advanced crocheters. The intermediate-advanced version of the pattern uses abbreviations while the beginner version of the pattern goes more into depth about each part of the pattern.
Version 1: Abbreviated Pattern of 1 Hour Easy Hat
- Make a magic loop.
2. Ch 3.
3. 12 dc into magic loop.
4. Sl st to join.
5. Ch 3.
6. 2 dc in each ch from hook.
7. Sl st to join.
8. *Ch 3.
9. Dc in each ch from hook.
10. Sl st to join.*
11. Repeat * – * for 6 rows. For a slouchier hat, 7 – 8 rows.
12. ~Ch 1.
13. Sc in BLO (back loops only) in each ch from hook.
14. Sl st to join.~
15. Repeat ~ – ~ for 4 – 5 rows (depending on how long you want the brim of your hat to be. I did 5 rows.)
16. Weave in ends.
17. Make a pom-pom. (If you want this hat to be a slouch hat and did 7 – 8 rows instead of 6, you do not have to add a pom-pom, though I recommend it.)
To make a pom-pom, wrap yarn around your hand 30 – 40 times, slip off, and tie around the middle. Cut through each loop at the end. I like to trim the pom-pom a little, too, to give it a rounder, more refined look.
Another option for easy, neat pom-poms is a pom-pom maker. I got a pom-pom maker kit, and it is such a fun kit to work with! I made a pom-pom rug with it and used my second-largest maker for the pom-pom on this hat.
18. Make sure to leave two long strands of yarn on your pom-pom. Use these strands to tie the pom-pom onto the top of your hat. Double knot and trim ends.
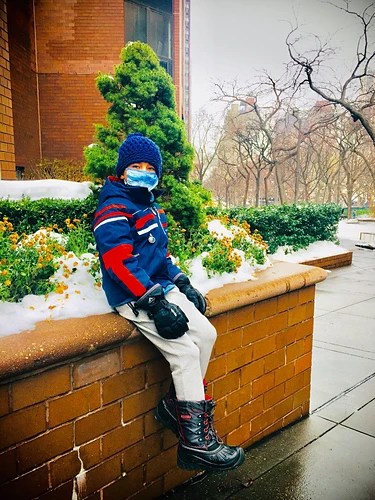
And: you’re done! Pair this awesome winter hat with any winter outfit. It’s comfortable AND warm!
Now for the beginner’s pattern:
- Make a magic loop. I have a tutorial on magic loops on this blog, so check it out if you don’t know how to make one.
2. Chain 3.
3. Double crochet 12 stitches INTO the magic loop. If you know how to double crochet into a chain, you can double crochet into a magic loop. Just do a normal double crochet stitch, but instead of inserting your hook under the yarn of the chain, insert it through the middle of the magic loop. This means that you are making 12 double crochet stitches into the SAME loop. I also have a tutorial on double crocheting into a magic loop on this blog, so check it out if you’re having trouble.
4. Make a slip stitch to join the last double crochet stitch to the last chain of your first chain three. A slip stitch is a relatively easy stitch- insert your hook into the last chain of your chain three, yarn over, and pull through all loops on your hook. That’s a slip stitch. I have a tutorial on that, too.
5. Chain 3.
6. Do two double crochet stitches into each chain from hook.
7. Make a slip stitch to join the last double crochet stitch you just made to the first one of the round. This is the same thing you did for the double crochet stitches in the magic loop.
8. *Chain 3.
9. Double crochet in each chain from hook.
10. Slip stitch to join the last double crochet stitch to the first one of the round.*
11. Repeat * – * (steps 8 – 10) for 6 rows. For a slouchier hat, 7 – 8 rows.
12. ~Chain 1.
13. Single crochet in BACK LOOPS ONLY in every chain from hook. (Tutorial on blog. Back loops only is easy- instead of inserting hook into both loops in chain, insert in the back loop only (the loop furthest from you). Back loops only gives the band a ribbed effect.)
14. Slip stitch to join last single crochet stitch to the first one of the round.~
15. Repeat ~ – ~ (steps 12 – 14) for 4 – 5 rows (depending on how long you want the brim of your hat to be. I did 5 rows.)
16. Weave in ends. This just means that you finish off your piece (take hook out of last loop, cut yarn, and thread the yarn through the loop. Weave the end of the yarn left into your piece.)
17. Make a pom-pom. (If you want this hat to be a slouch hat and did 7 – 8 rows instead of 6, you do not have to add a pom-pom, though I recommend it.)
To make a pom-pom, wrap yarn around your hand 30 – 40 times, slip off, and tie around the middle. Cut through each loop at the end. I like to trim the pom-pom a little, too, to give it a rounder, more refined look.
Another option for easy, neat pom-poms is a pom-pom maker. I got a pom-pom maker kit, and it is such a fun kit to work with! I made a pom-pom rug with it and used my second-largest maker for the pom-pom on this hat.
18. Make sure to leave two long strands of yarn on your pom-pom. Use these strands to tie the pom-pom onto the top of your hat. Double knot and trim ends.
And: you’re done! Pair this awesome winter hat with any winter outfit. It’s comfortable AND warm!

That’s it for this pattern. It’s easy, quick, and fun- plus it looks great! Make it for yourself or as a gift. With the holiday season in full blast, this hat will be in constant demand!
Comment on this post. I love hearing feedback, compliments or critique! I will try my best to answer all questions posted in the comment section. Share photos of your own crochet 1 Hour Easy Winter Hat: Free Pattern. Pin this project on Pinterest, too!
Thanks so much for checking out this pattern! For more free patterns like it, check out my blog.
Happy Crocheting!

Leave a comment